Well, today is the last day of winter break, and overall, I can say it’s been a good one. We had a good Christmas, we had some down time, and I did spend a good chunk of time getting our house somewhat in order.
The Christmas tree and decorations finally got put up yesterday. Since I did spend a bit of time purging and organizing, today I’m sharing a few organizational things that my family utilizes.
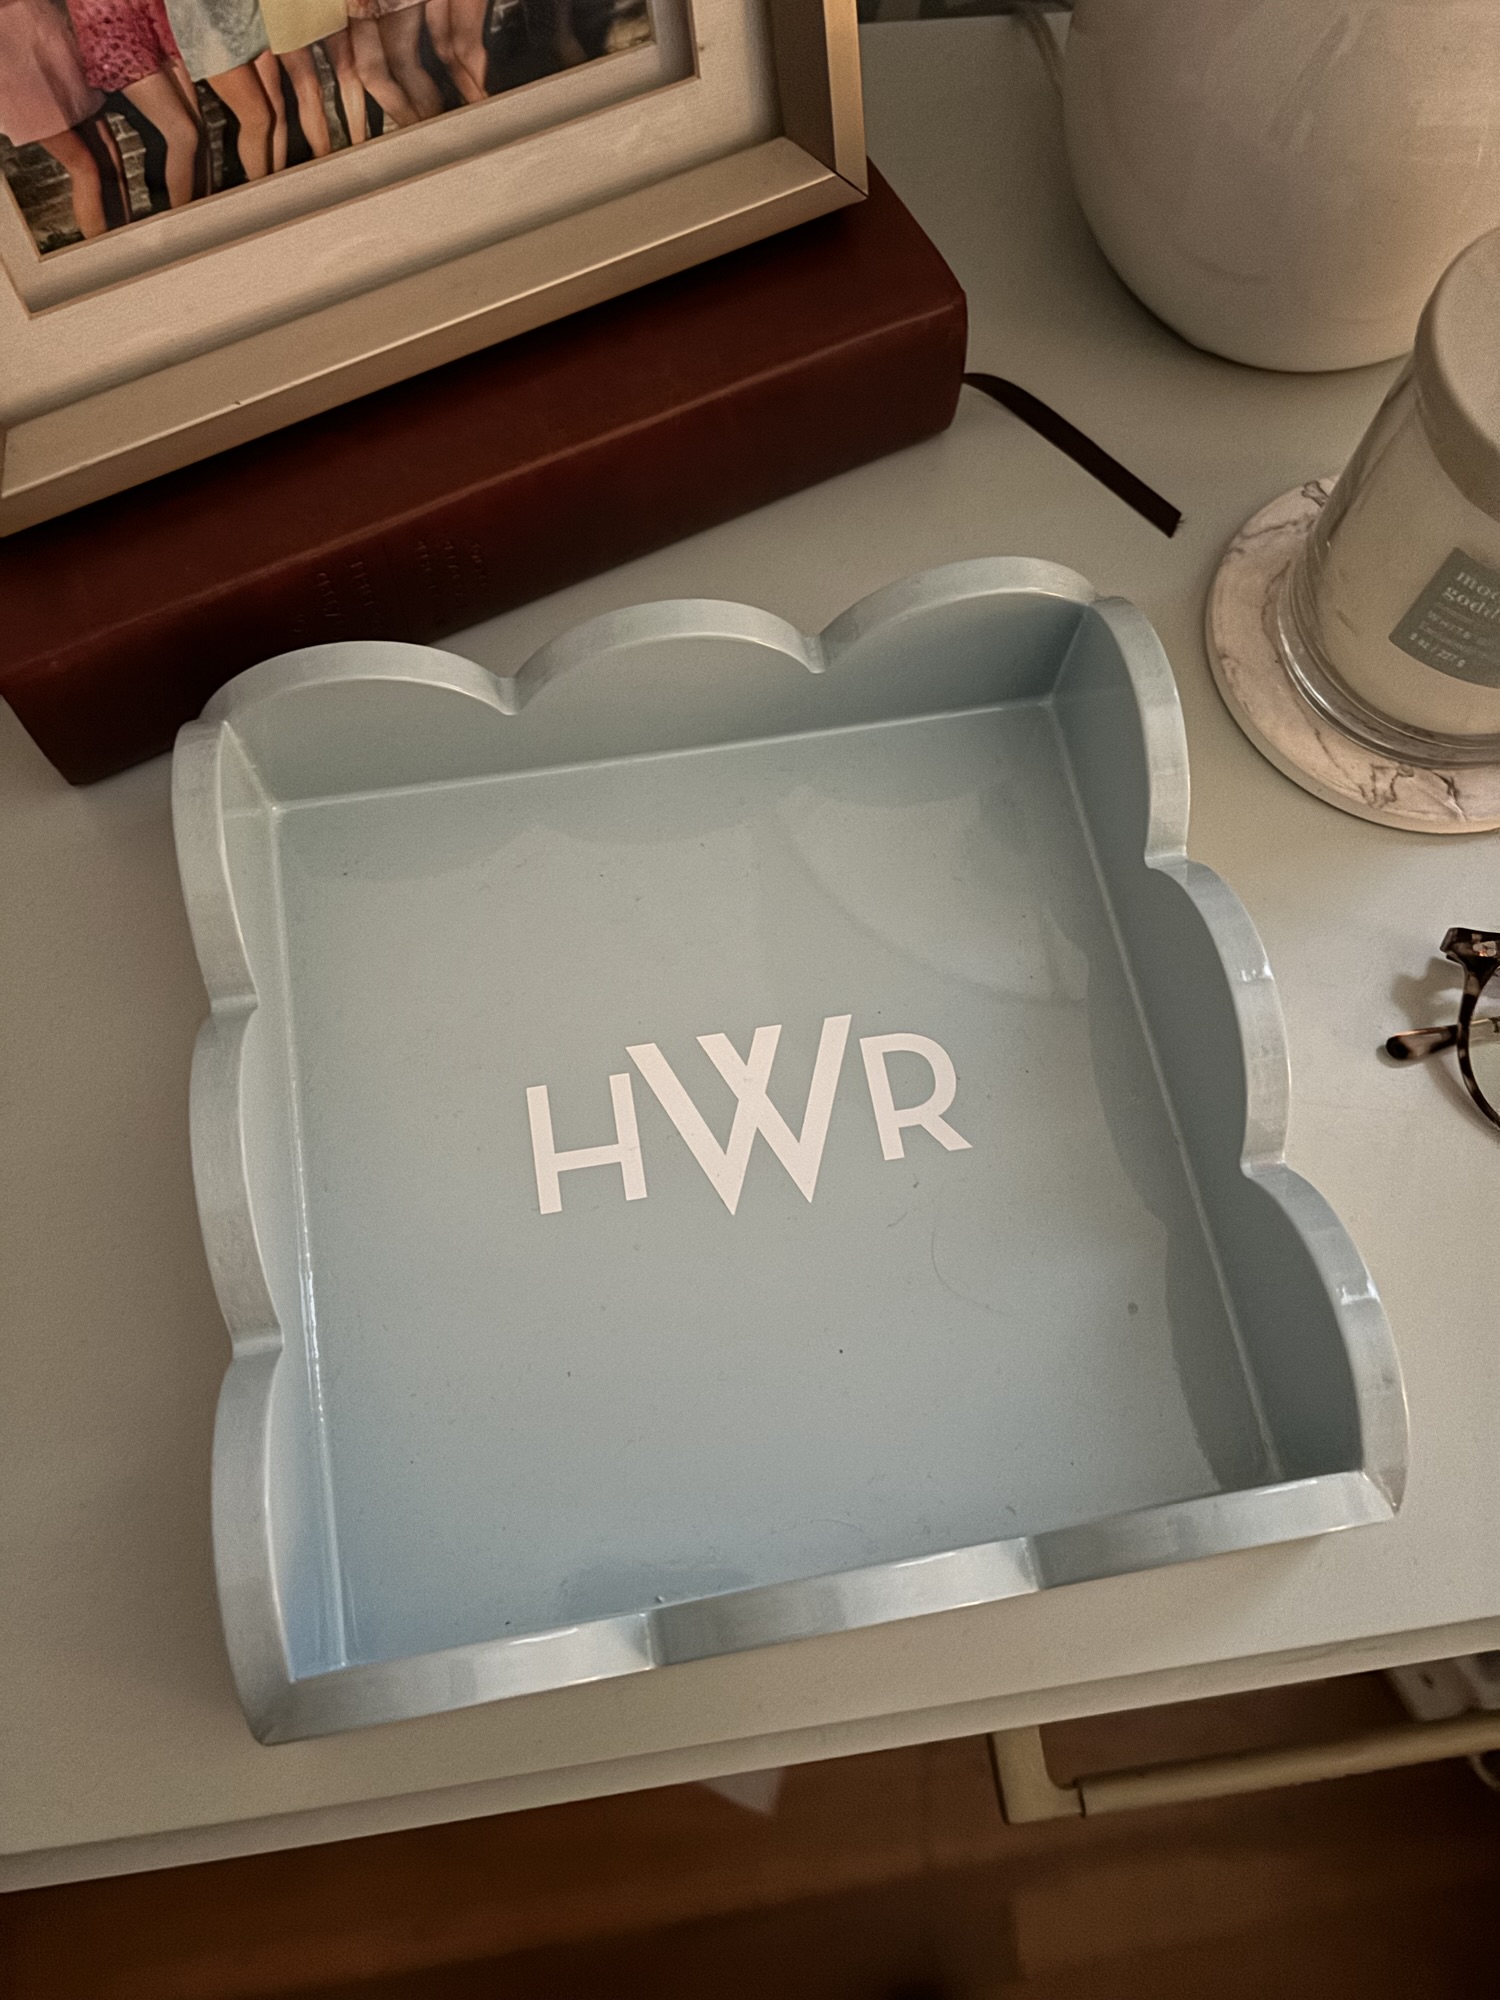
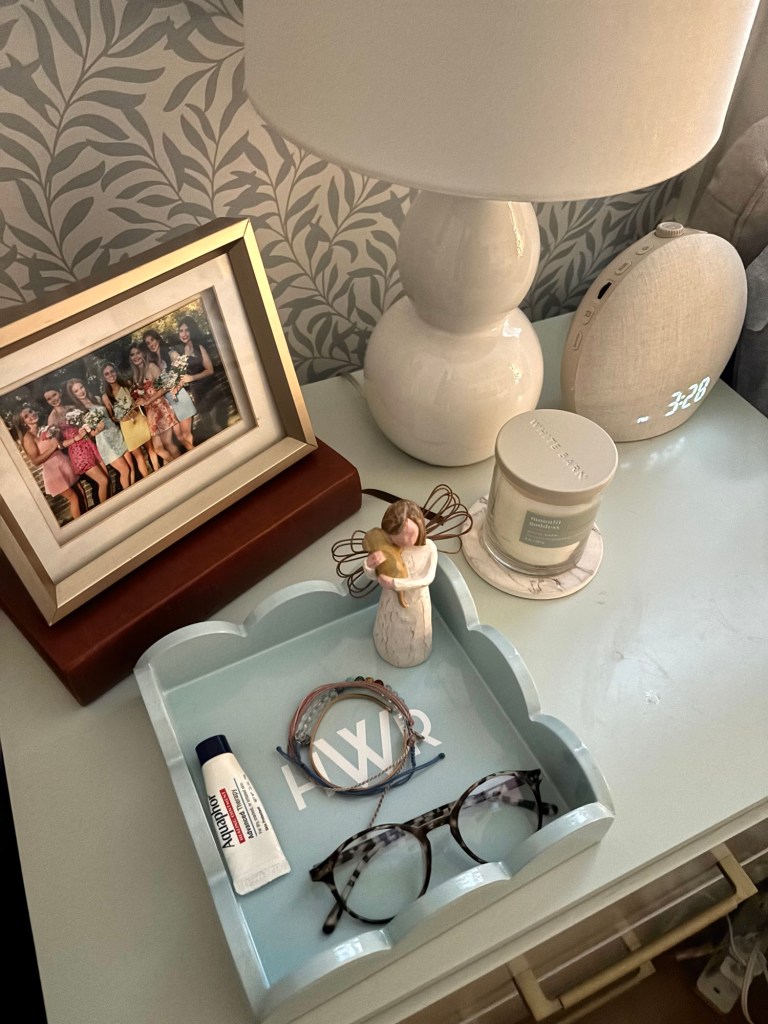
Starting off strong with something very cute. I saw these little scallop trays on a Mark and Graham ad back in November, and I thought one would be perfect for Hadley.
When she opened it on Christmas morning, she said, “how cute!” …and it is. She tends to collect things on her bedside table, so I thought this would be a good spot for her to put her bracelets, car keys (one day…still looking for a used car!), and other odds and ends.
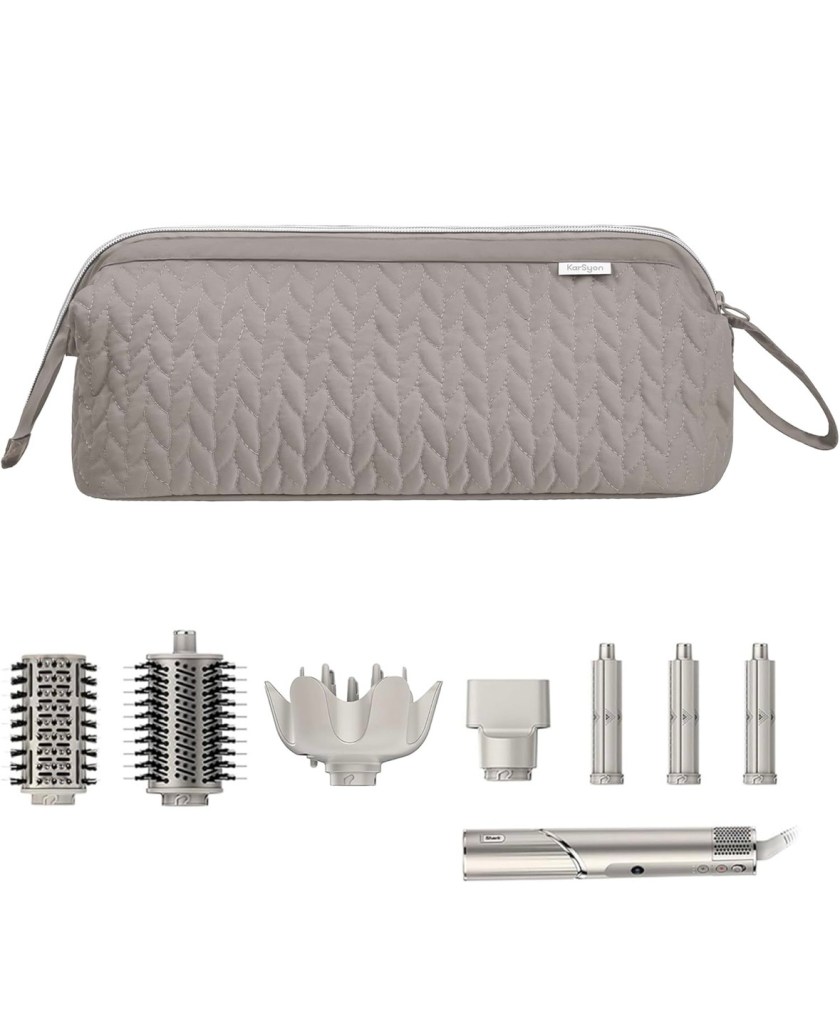
Also, since her vanity only has one drawer, she tends to have her hair tools everywhere (which drives me crazy). I got her this hair tools travel bag, so she can keep her hair tools in it that she’s not using, but she can also use it for travel. It’s a win/win! This bag was one of her Christmas gifts, and I put some new makeup brushes in it which was something that she needed too.
Screenshot
When we went to KC for Thanksgiving, Hayden just threw his golf shoes in the car, and when I saw this on Amazon, I thought it would be a good way for him to store his shoes and transport them when needed. There are pockets for golf balls and tees too.
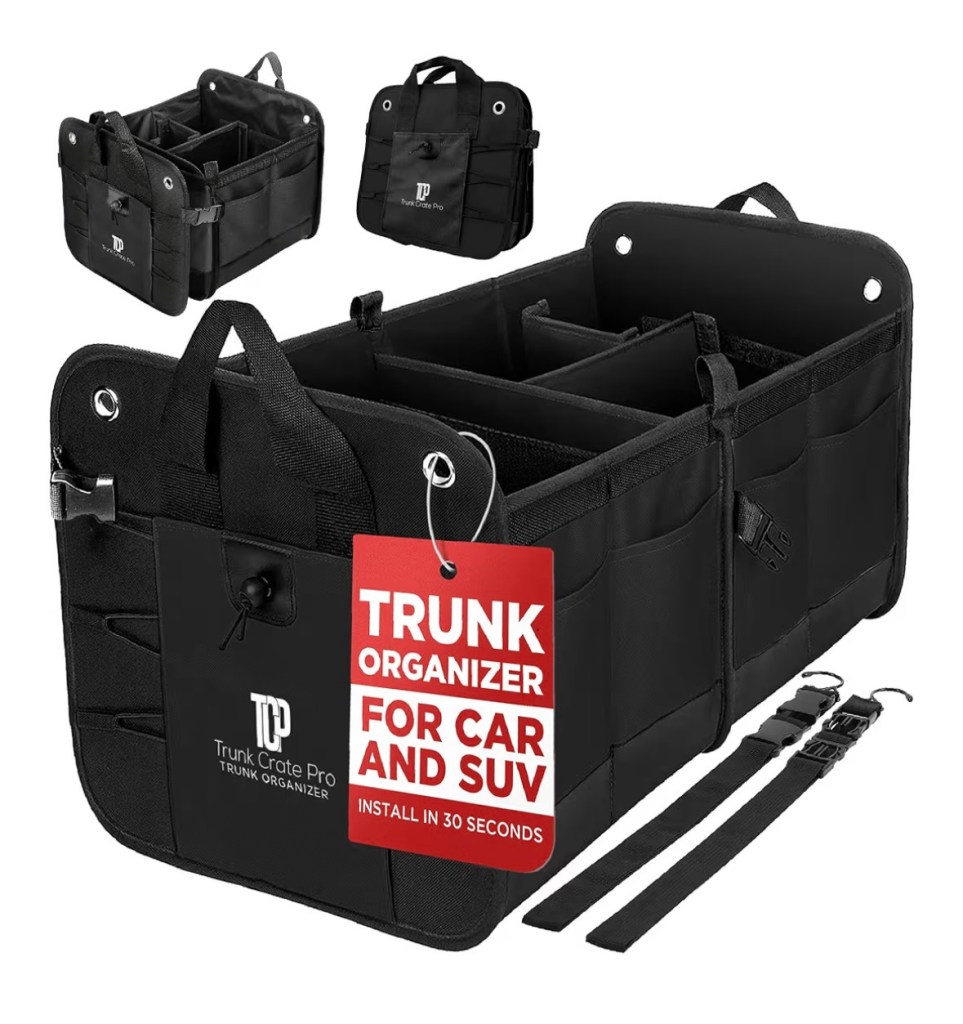
Two years ago, I got Trav this trunk organizer for his car, and he’s gotten such good use out of it.
This year, I got him this hat organizer for one of this presents (who says love is dead?!)…honestly though, every year, I get him some kind of “practical/organizational” gift, and he appreciates it. Anyway, this is a set of two, and they stack on each other. He ended up using one, and I used the other for my hats.
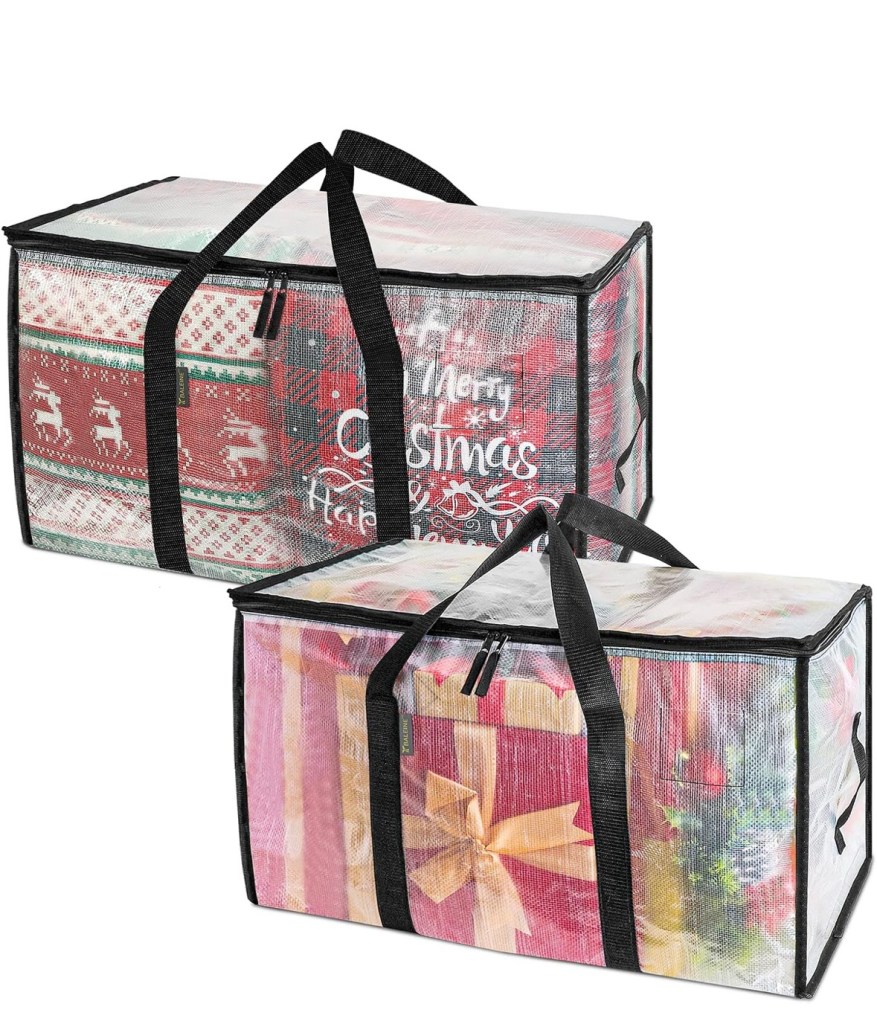
I’ve had the same pillow storage bags for years, and one of the zippers broke, so I bought a set of these moving/storage bags, and they are perfect. I like that they are longer and the handles make for easy transporting.
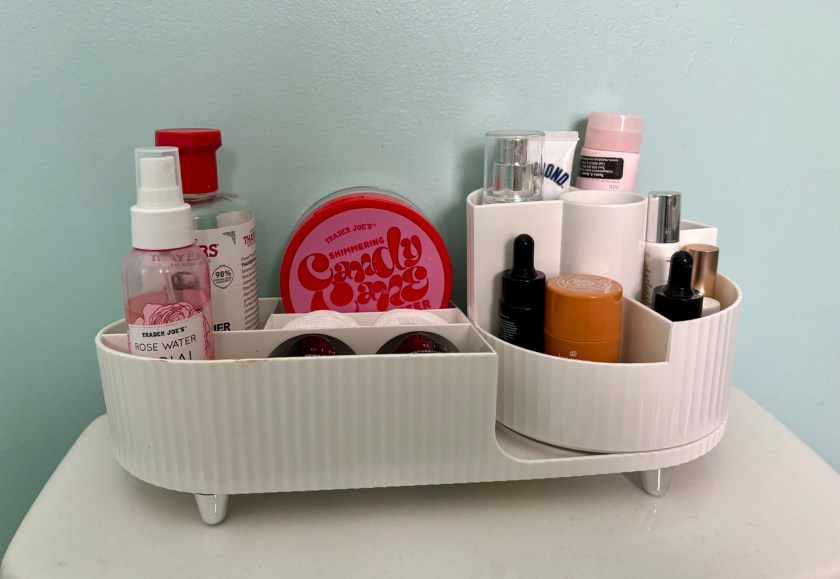
One other area I tidied over break was my bathroom closet, vanity drawers, and skincare. I’ve had this skincare/makeup organizer for a couple of years, and I re-organized it and prioritized it with products I use daily.
Screenshot
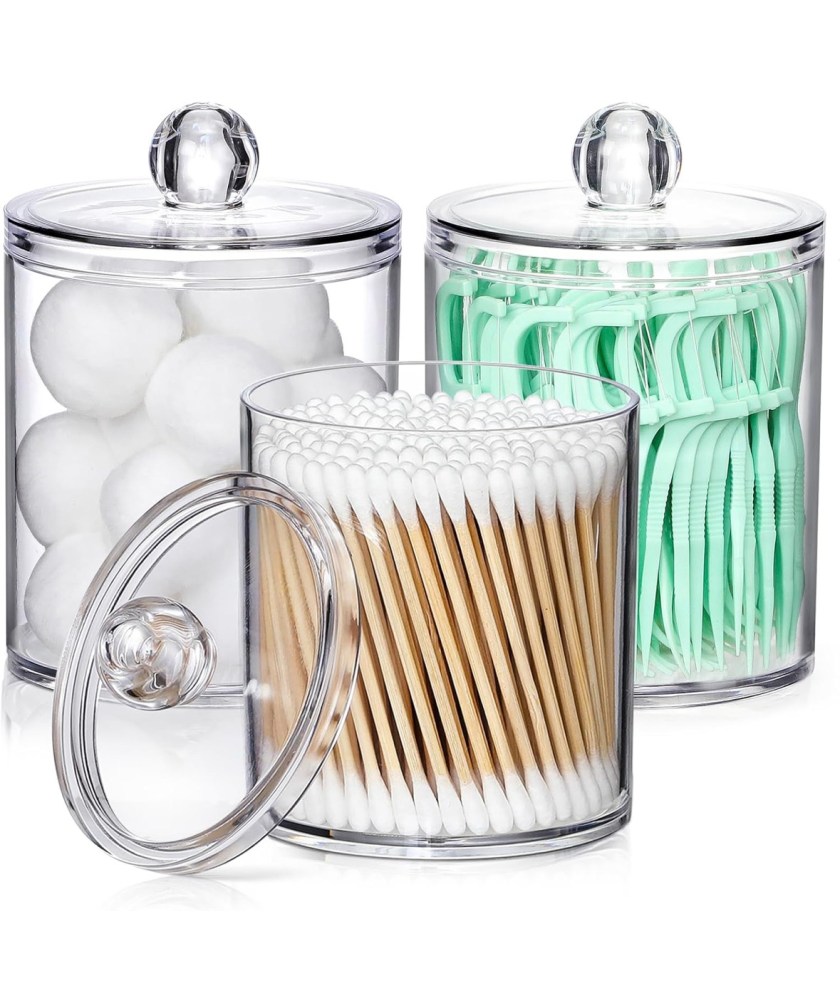
We’re still using these little clear (plastic) jars in our bathrooms to hold Q-tips, cotton balls and shower steamers.
Screenshot
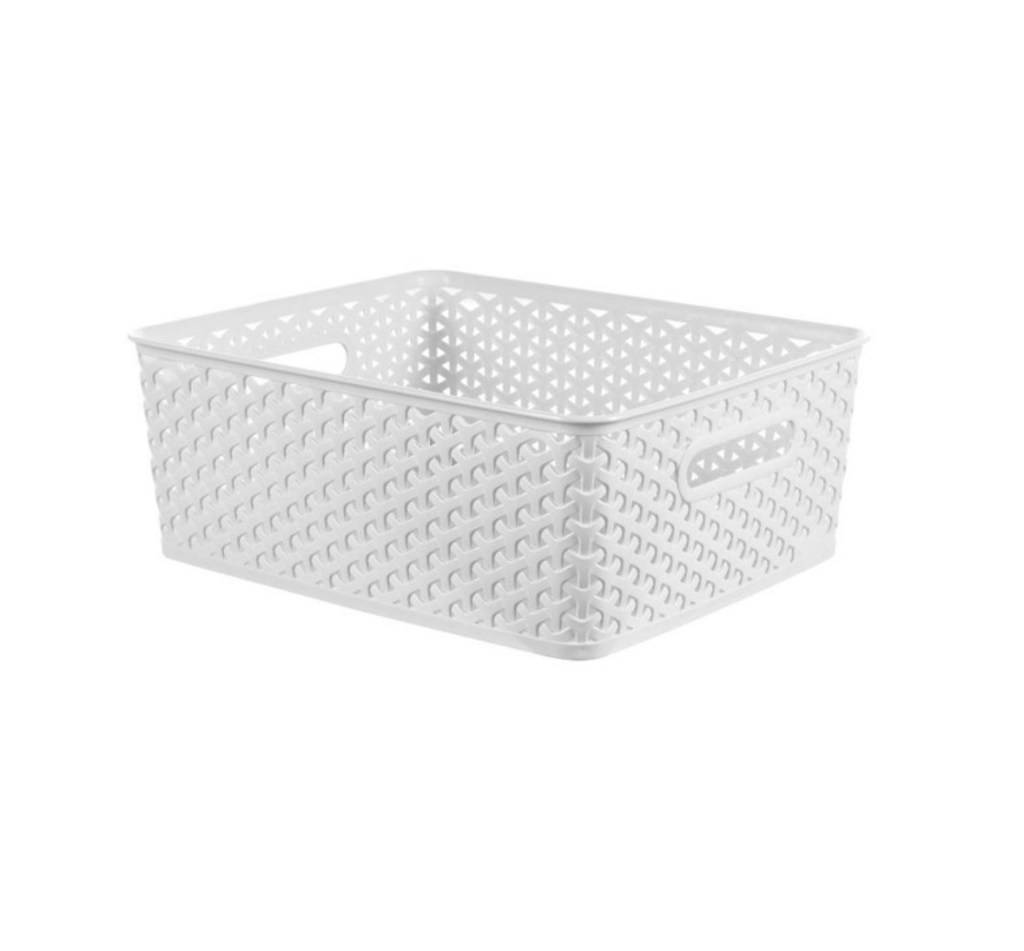
We have a few of these medium size Bright room baskets from Target, and I picked up a couple more this weekend. They are perfect for under the sink in the kitchen, holding papers in our office cabinet, storage for Homer’s dog food and treats and more. I have a couple of large ones in my hall closet that hold my off season sweaters. Target has a small size too.
For me, the purging and organizing can sometimes feel overwhelming since it’s a “it has to get messy before it gets better” situation, but once things are put in their place, my type A brain can relax.
I hope you’ve been having a great weekend. I think I’m getting a little peek at our future because this weekend has mostly just been Travis and me. Hayden will be home from running camp today, and Hadley has had volleyball late every night last week (including Friday), and then yesterday she went to the lake with a friend. So, we’ll all be reunited today, and I can’t wait for that.
My apologies that I feel like a theme of this summer has been me realizing how big my kids are getting. In turn, that has made me a little reminiscent on the summer days gone by which goes with today’s blog topic.
Oh…I remember the days of trying to keep my kids busy during the day. Of course, nap time helped pass some time when they were little, but we’d always have a mix of downtime and activities to pass the time until Travis got home from work!
I’ve had Pinterest for over ten years, and I have a ton of boards, a few of which still apply to the younger years with the kids. Like many of my Pinterest ideas, I’ve only saved the ideas and not done anything with them. Here are a few cute crafts I’ve saved through the years.
1. Egg Carton Flowers
So, this is probably the last craft Hadley has ever made, but she made these flowers during the 2020 Covid months when we were at home.
**ok –so I was just going to share those five ideas, and then Pinterest was spamming me with more ideas including…tacos and ice cream cones…so of course I had to share those ideas too.
Fun fact: I sponge painted the walls of my bedroom in high school. That technique was all the rage.
This ice cream cone craft is too cute.
Idea from Happy Toddler Playtime
**My apologies for how many times I used the word “cute” in this post. I tried to restrain myself!
How crazy would my high school students think I am if I incorporate a craft or two into my lesson plans?!
While I’m thinking my “target audience” for this blog is readers who have kids my kids’ ages or older, who knows…maybe one of these will be a fun summer craft for a mom or grandma who needs an idea.
Well, I’m not sure if this is riveting content or not, but I wanted to document my closet clean out of 2022. I’m writing this post as a reference point for me to remember to never let my closet get as bad as it did and to remember the process.
A few things about the closet situation in our house….We have lots of closets, but none of them are big.
We have a hall closet as soon as you walk in the front door. It backs up to Hadley’s closet, so they are the same…double doors with a long rod for hanging and then two long shelves above. We keep all coats in there, and it’s where I keep my hanging decorations for the front door.
We have a closet off the kitchen where we keep the dog food, appliances we don’t use often, and cleaning supplies.
We have another hall closet on our main hall that is similar in size to Hayden’s closet and the closet in our bedroom. When we first moved in, Travis actually used that hall closet as his closet, and I used the one in our bedroom.
Once we finished the basement bathroom, Travis started using that bathroom and the closet in the basement. Then, the hall closet just became and extra spot for us. It’s where I keep a few decorations, candles, Homer’s leash and toys, pool towels and pool bag, and Hadley’s dance bag. Last summer, I did move my dresses in there just to help relieve some of the congestion in my closet.
I’ve needed to do this purge for over a year. “Organize closet” was on my “to do” last summer. I just never got to it, and to be honest, it just continued to feel more and more overwhelming of a task. So, I just kept putting it off.
Nothing like a Covid quarantine in the bedroom to make me finally get to it. On day 5 of my 5 day quarantine, I finally got started. Silly me…I thought it would take a few hours. Well…it actually took a few hours over a few days.
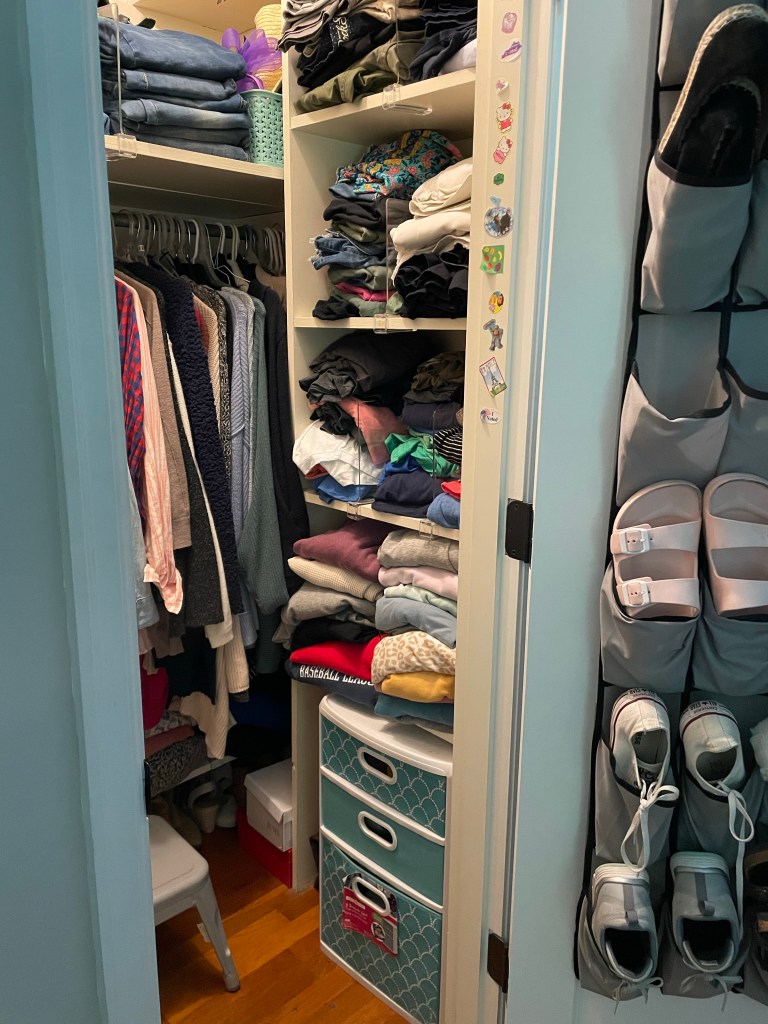
Before:
Here’s the before…
When I took the “before” photo, I was just holding myself accountable…if I’d backed up a few more steps, you’d see quite a bit on the closet floor too. *sigh*
I’d be embarrassed of the “before” photo if I wasn’t so proud of the “after.”
The Process:
Here’s how I (finally!) went about getting organized:
On the first day, I tackled my dresser and chest of drawers. I started with my dresser. I went through my pjs, workout clothes, t-shirts, and socks.
Then I moved on to the chest of drawers and went through seasonal sweatshirts, swimsuits, coverup, and a few other odds and ends.
The next day, I emptied out all the clothes on the shelves on the right side of my closet as well as the shelf below my hanging clothes. I also went through my shoes and purses as well. (At this point, I panic shopped on Amazon and picked up a shoe organizer for under the bed and two boxes with lids for purses. I ended up returning both because I didn’t end up needing them!)
On the third day, I went through hanging clothes and jeans.
Finally, I went through my dresses in the hall closet. Then, I just went back through everything to make sure it was organized.
With each phase, I made a keep, donate, and try on pile. This is the first time in a while that I forced myself to try on things to decide if I still wanted to keep them or not.
My weight fluctuates, and to be honest for over a year and a half was kind of stuck no matter what I tried. I think that was some of my hang up as well with the closet. I wasn’t in a good head space to try things on even in January. I’ve made some progress over the past few months, and I think that helped me want to go through my clothes and get everything in order.
Of course, styles change too! I’ve had some of these clothes for years.
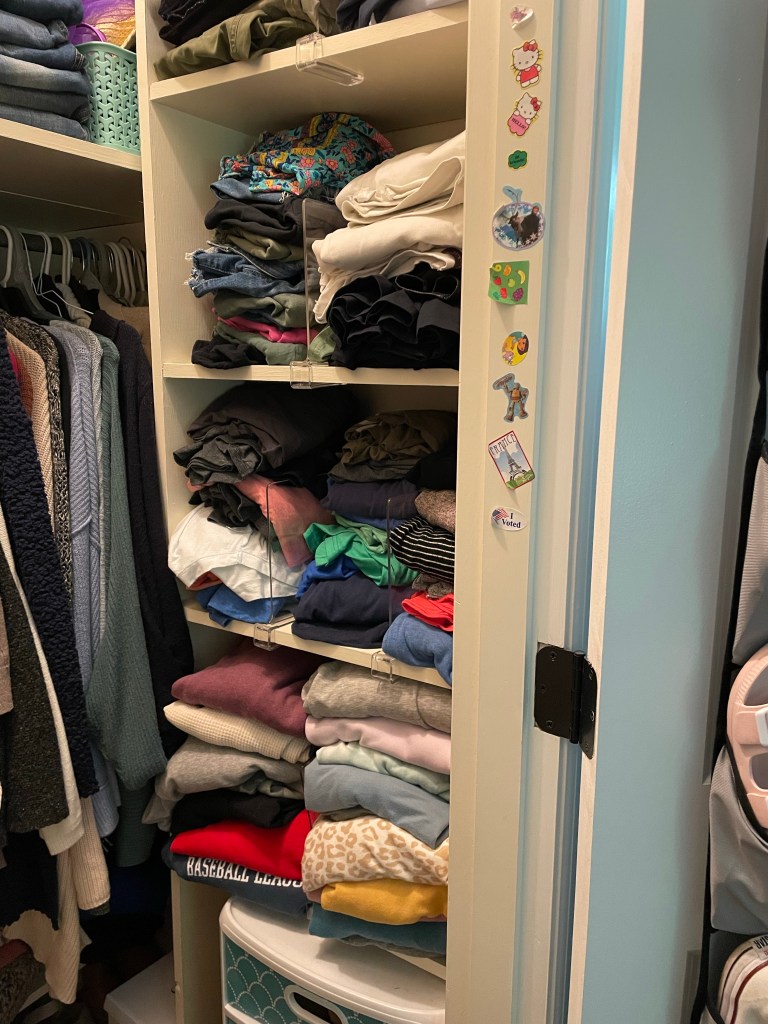
After:
Ta….da….!
…five big trash bags later…
I smile every time I open the closet door now. It’s amazing how overwhelmed I felt every single time I opened the door to get dressed. Not anymore!
I ended up moving the three drawer storage that stuck out of the left side of my closet, and put it in the nook to the right. I have sandals and flip flops in the smaller drawers and then some tennis shoes in the bigger drawer.
Do I still have too many shoes? Yes. But…at least they are now organized.
Little better view side of my closet:
The left side of my closet used to have a scarf organizer that hung down. Remember when decorative scarves were all the rage? I ended up saving a few, but since I don’t wear them often, they are in a basket at the top of my closet.
I ended up hanging a couple beach hats on the left, and I smile when I see them.
Hadley actually had a good idea to maybe add one or two shelves for my bedside pile of books. I think she’s on to something!
Travis was so impressed (Hadley too!) with the final outcome. When Travis asked me what was in some of my drawers, I did get a side eye for having two drawers of pjs. I will not apologize for my love of pajamas!
One more thing I did in my closet…I added a brighter bulb. Just doing that helped lighten up that small space.
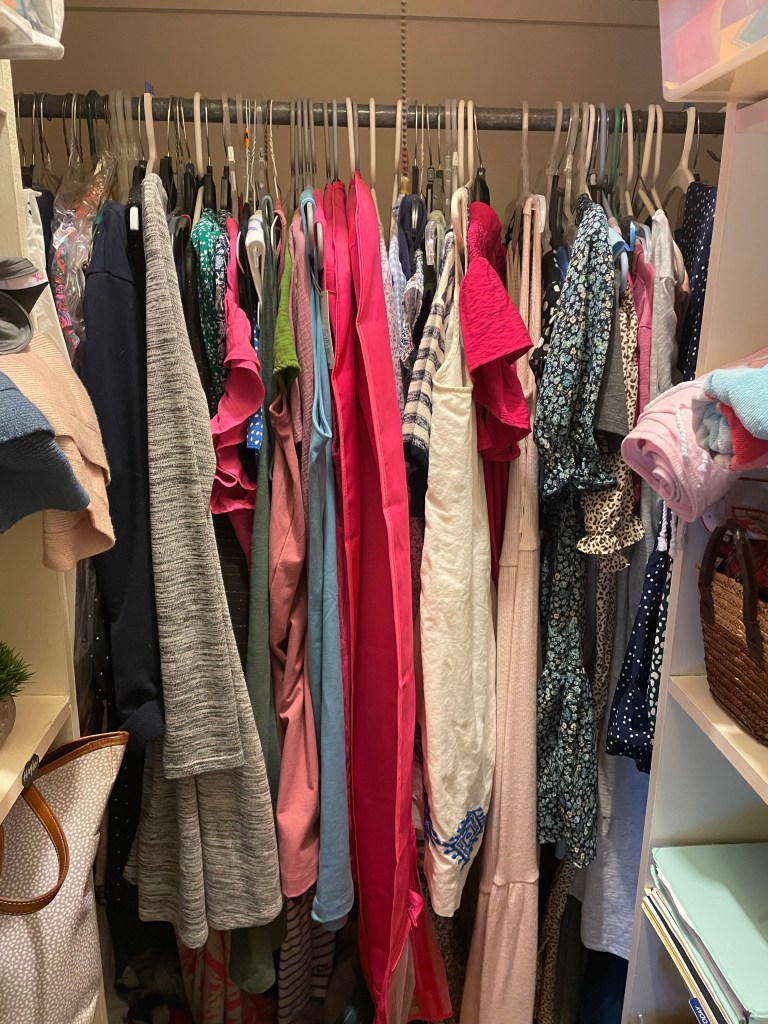
Hall closet:
Like I said, when we first moved in, Travis used this closet. Everything I owned basically fit in the bedroom closet. That was almost eight years ago, so obviously I’ve accumulated more throughout time.
Last summer, just moving dresses here helped my closet so much. For years, I was adamant about not wanting to put off season clothes elsewhere, but this was a good compromise. If I want to wear a dress, I know where to go. I also put some of my favorite sweaters on the shelf in this closet too. Otherwise, everything else is in my room.
In the hall closet, I kept three of these storage totes of odds and ends…sentimental t-shirts, or clothes I wore occasionally. I ended up getting rid of enough items to downsize to one of these. I did end up using one for my nicer purses that I don’t use very often. Then, I have one to spare. That being said, I feel like I should only need one of these for occasional clothes. If I haven’t worn it, it should go.
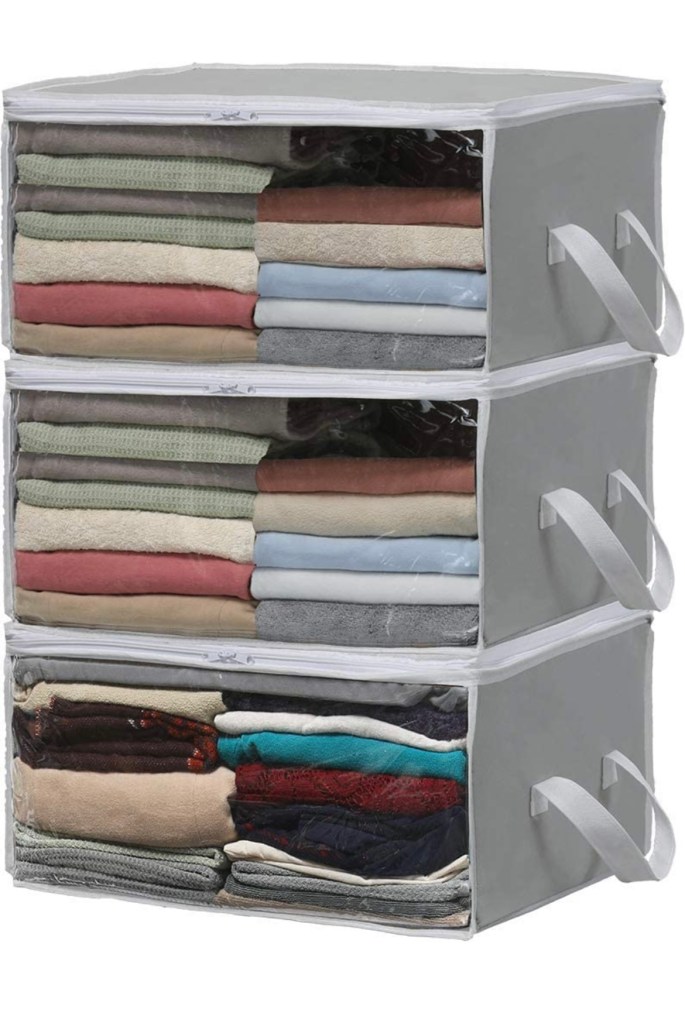
The real MVPs of closet organization:
I purchased these acrylic dividers and used them in both closets. I used them between my jeans and sweatshirts in my closet and between the few sweaters in the hall closet.
On a whim, I decided to buy a few more hangers so they would match. I’ve purchased this set a few times as we’ve transitioned the kids hangers too. They aren’t fancy hangers, but it is something I noticed when I open my closet. The same hangers just make it more streamlined. (I took the “after” photos before these arrived.)
I’ve had these stackable storage bins for almost two years. Like I said, I now use one to store a few pieces of clothes, some purses, and then now I have one spare!
Shew! If you made it to the end, thanks for hanging in there. I’m not sure what it says about me that having this task completed is just about the highlight of my summer.
I’m going to try to stay on top of my closet(s), and donate items that I don’t wear at the end of each season.
This is definitely the smallest closet I’ve ever had. I know it’s “first world problems” to wish for a bigger closet, but a girl can dream!
Do you have any closet organization tips? I’d love to hear them! I need to stay motivated to keep it as neat and tidy as it is now!
I hope you are having a great week.
{Amazon affiliate links. Thanks for supporting my blog.}
When I shared the baseball post last week, it reminded me that I’ve been asked how I keep up with my photos. I feel like I can find a “throwback” photo in a matter of minutes!
Well, the answer is Shutterfly.
Since 2009 (or early 2010), I started using that app to upload photos from my phone.
Of course, I’ve also used Shutterfly through the years to order prints (now I use Walgreens), create photo gifts, and create holiday cards too.
So, I have many albums titled things like…January 2010, Feb/March 2010, Isle of Palms vacay 2017, Homer, first day of school 1st grade, soccer, baseball Reds, dance, and more!
I’m not sure what took me soo long, but it wasn’t until 2020 when I finally organized the albums into folders. So, I have a 2020 folder that has an album for each month along with other general events/activities like camp, sports, vacation, etc. Then, I repeated that process for 2021 and have started the same for 2022.
Actually, I know I can go back and put those other years into one folder, but I’ve yet to do that.
I have still kept general album categories like “old photos,” “kids’ elementary artwork,” “house,” “blog,” and “Homer.” Speaking of Homer, that album definitely has the most photos…guess how many photos I’ve taken of Homer! Take a guess, and I will share the answer at the bottom of this post.
One of my favorite albums is my “recipe” album. You know when you screenshot recipes on Instagram or Facebook and they just live in your camera roll? Well, that’s where I put those recipes to keep for reference.
Even with my Shutterfly organization, I still sometimes have to take a few minutes at the end of the month to upload photos….and occasionally I have to intentionally sit down and delete photos from my phone.
Also, I know my phone backs up to the Apple iCloud (is that what it’s called?!), but I still like to use Shutterfly, because it just seems easier for me to access.
The only thing I wish Shutterfly would do is save videos, but it doesn’t. I think those go to the cloud too…or my Google storage…or both?!?, but I still don’t feel like anything is as easy to access as Shutterfly.
What about you? How do you save your photos? I know there are similar apps to Shutterfly and everyone probably has their preference, but I do love Shutterfly!
If only there was an app that could immediately organize my closet… *sigh*
I’m spending most of today on a Zoom for a professional development session. While not my ideal Thursday, I do prefer to knock out these hours in the summer…and from the comfort of my home is even better.
747. That’s how many photos I’ve taken of Homer in three years! He’s the most loved dog…ever.
Hello and Happy Monday! How was your weekend? We were able to make it to the pumpkin patch on Friday which always makes my fall loving heart happy. Sunshine, apple cider donuts, and pumpkins kicked our weekend off right. I plan on sharing more about that tomorrow!
We spent Saturday morning at the kids’ cross country meet, and then we were going to head straight to Hayden’s baseball tournament, but got word as we arrived at the cross country meet that the baseball tournament had been canceled due to rain. All of the sudden, this mama had her entire weekend back! Hadley placed 6th in her race, and Hayden had another 1st place finish! Their team is so fun to watch and both the boys and girls teams earned top 5 finishes at the meet!
Once we got back to Lex, we decided to have brunch at Winchells which is one of our favorite places. Then, the rest of the weekend was pretty relaxing. With overcast and/or rainy skies for Saturday and Sunday, we just hung out, did chores around the house, took a nap or two and just recharged. I did catch most of the replay of my MIZZOU Tigers beating LSU and then the CATS won as well. Weekends like these don’t happen very often, so I was happy to have this extra time. Hayden talked Travis into 9 holes of golf Sunday afternoon once it quit raining so steadily. I prepped dinner and got organized for the week.
Now, on to the topic of today’s post…
Today, I’m joining Lauren, Ashley, and others for their Not Just a Mom series. This month’s focus is on “getting crafty.”
I do love a craft or a quick project. Now, I don’t seem to have as much time as I used to, but I do like to pin on Pinterest, plan a craft for a party decoration, or update an outdated piece of furniture with paint!
Here are some of my favorite crafts through the years…
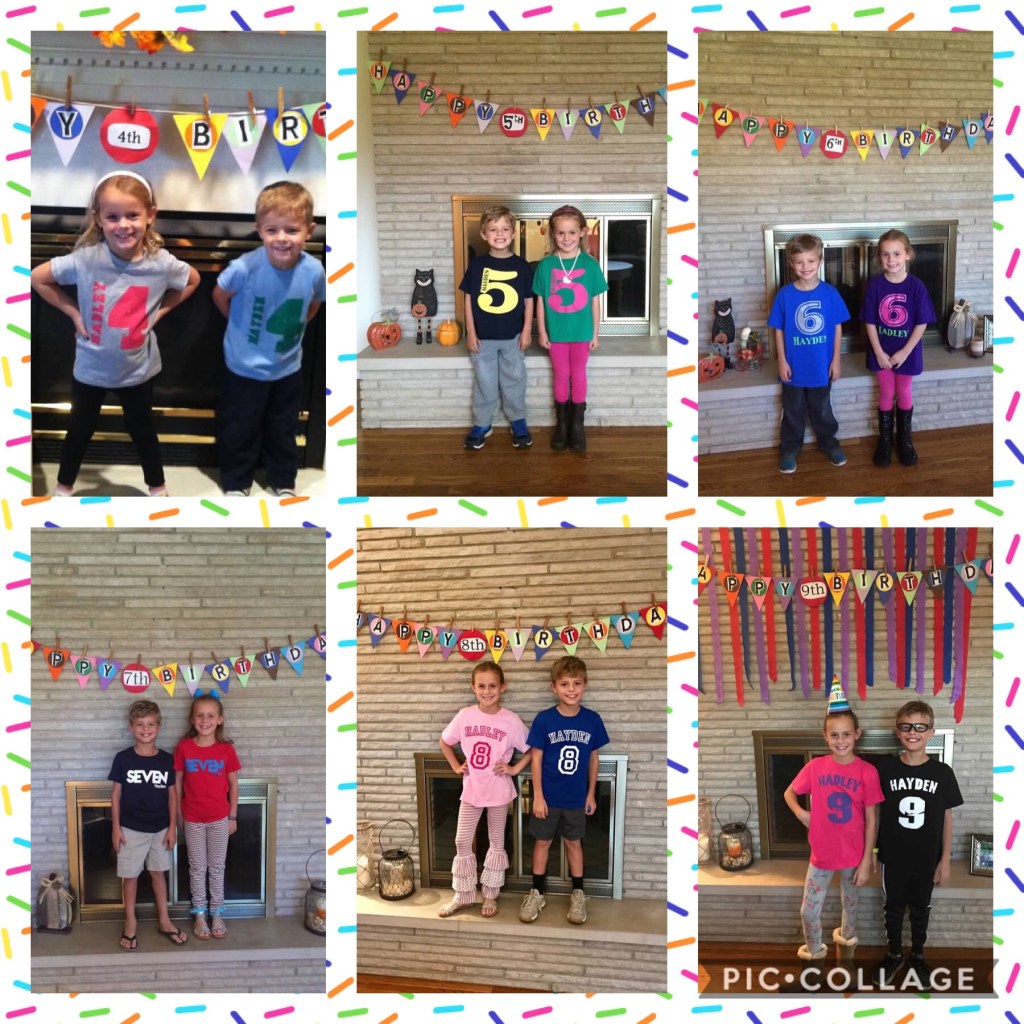
Birthday Banner:
I made this banner for the kids right before their 3rd birthday. I cut out the triangles and circles on card stock, printed the letters, and glued them on. Then, I clipped each each triangle to string with clothes pins. I’ve used this banner every birthday since, and just change out the age for the birthday.
Through the years…
Last year, I told them I was ok with quitting the birthday shirt tradition (Hadley would probably play along until she’s 50 and Hayden was over it a couple of years ago😉) and that I could even part with the banner tradition if necessary. I just wanted to respect them and not cling tight to all the traditions I started when they were younger if they didn’t want all the hype #wheredidmybabiesgo
Both said they want the banner tradition to continue…So, maybe I will hang it next month when they turn 11. (How is that possible?!)
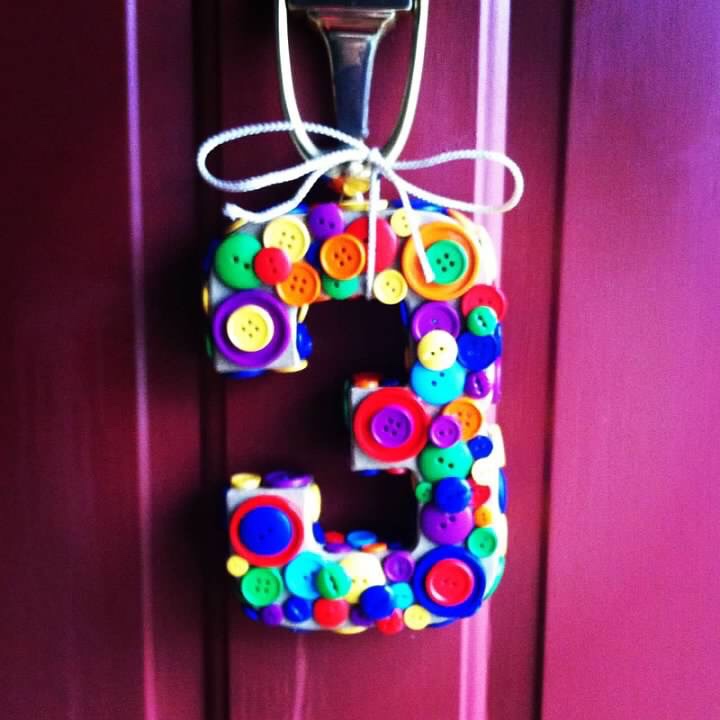
Birthday Party Decoration:
For their 3rd birthday party, I hot glued these buttons on a thick cardboard 3 that I purchased at Michael’s. Then, I hung it from the front door as a decoration for when guests arrived at the party. Super simple, colorful and fun.
Hadley’s Room:
When the kids were about 3 1/2, we gave them each their own room. I knew we’d prbably move that next year, so I didn’t want to paint. We got vinyl stickers with their names, and I added a few homemade decorations.
The hoops with fabric is one of my favorite ideas. So easy, inexpensive, and cute.
I painted Hadley’s bedside table white, and stapled tutu fabric around the sides. See, I’m all about the cute and easy craft and project!
I also made the kids each a canvas with a quote. I just bought the canvases at Michael’s, put vinyl letters on, painted over the letters, and then when the paint dried, I peeled the letters off. I mean I probably won’t open an Etsy shop for the signs, but I thought they were cute for a kid’s room and a quick project.
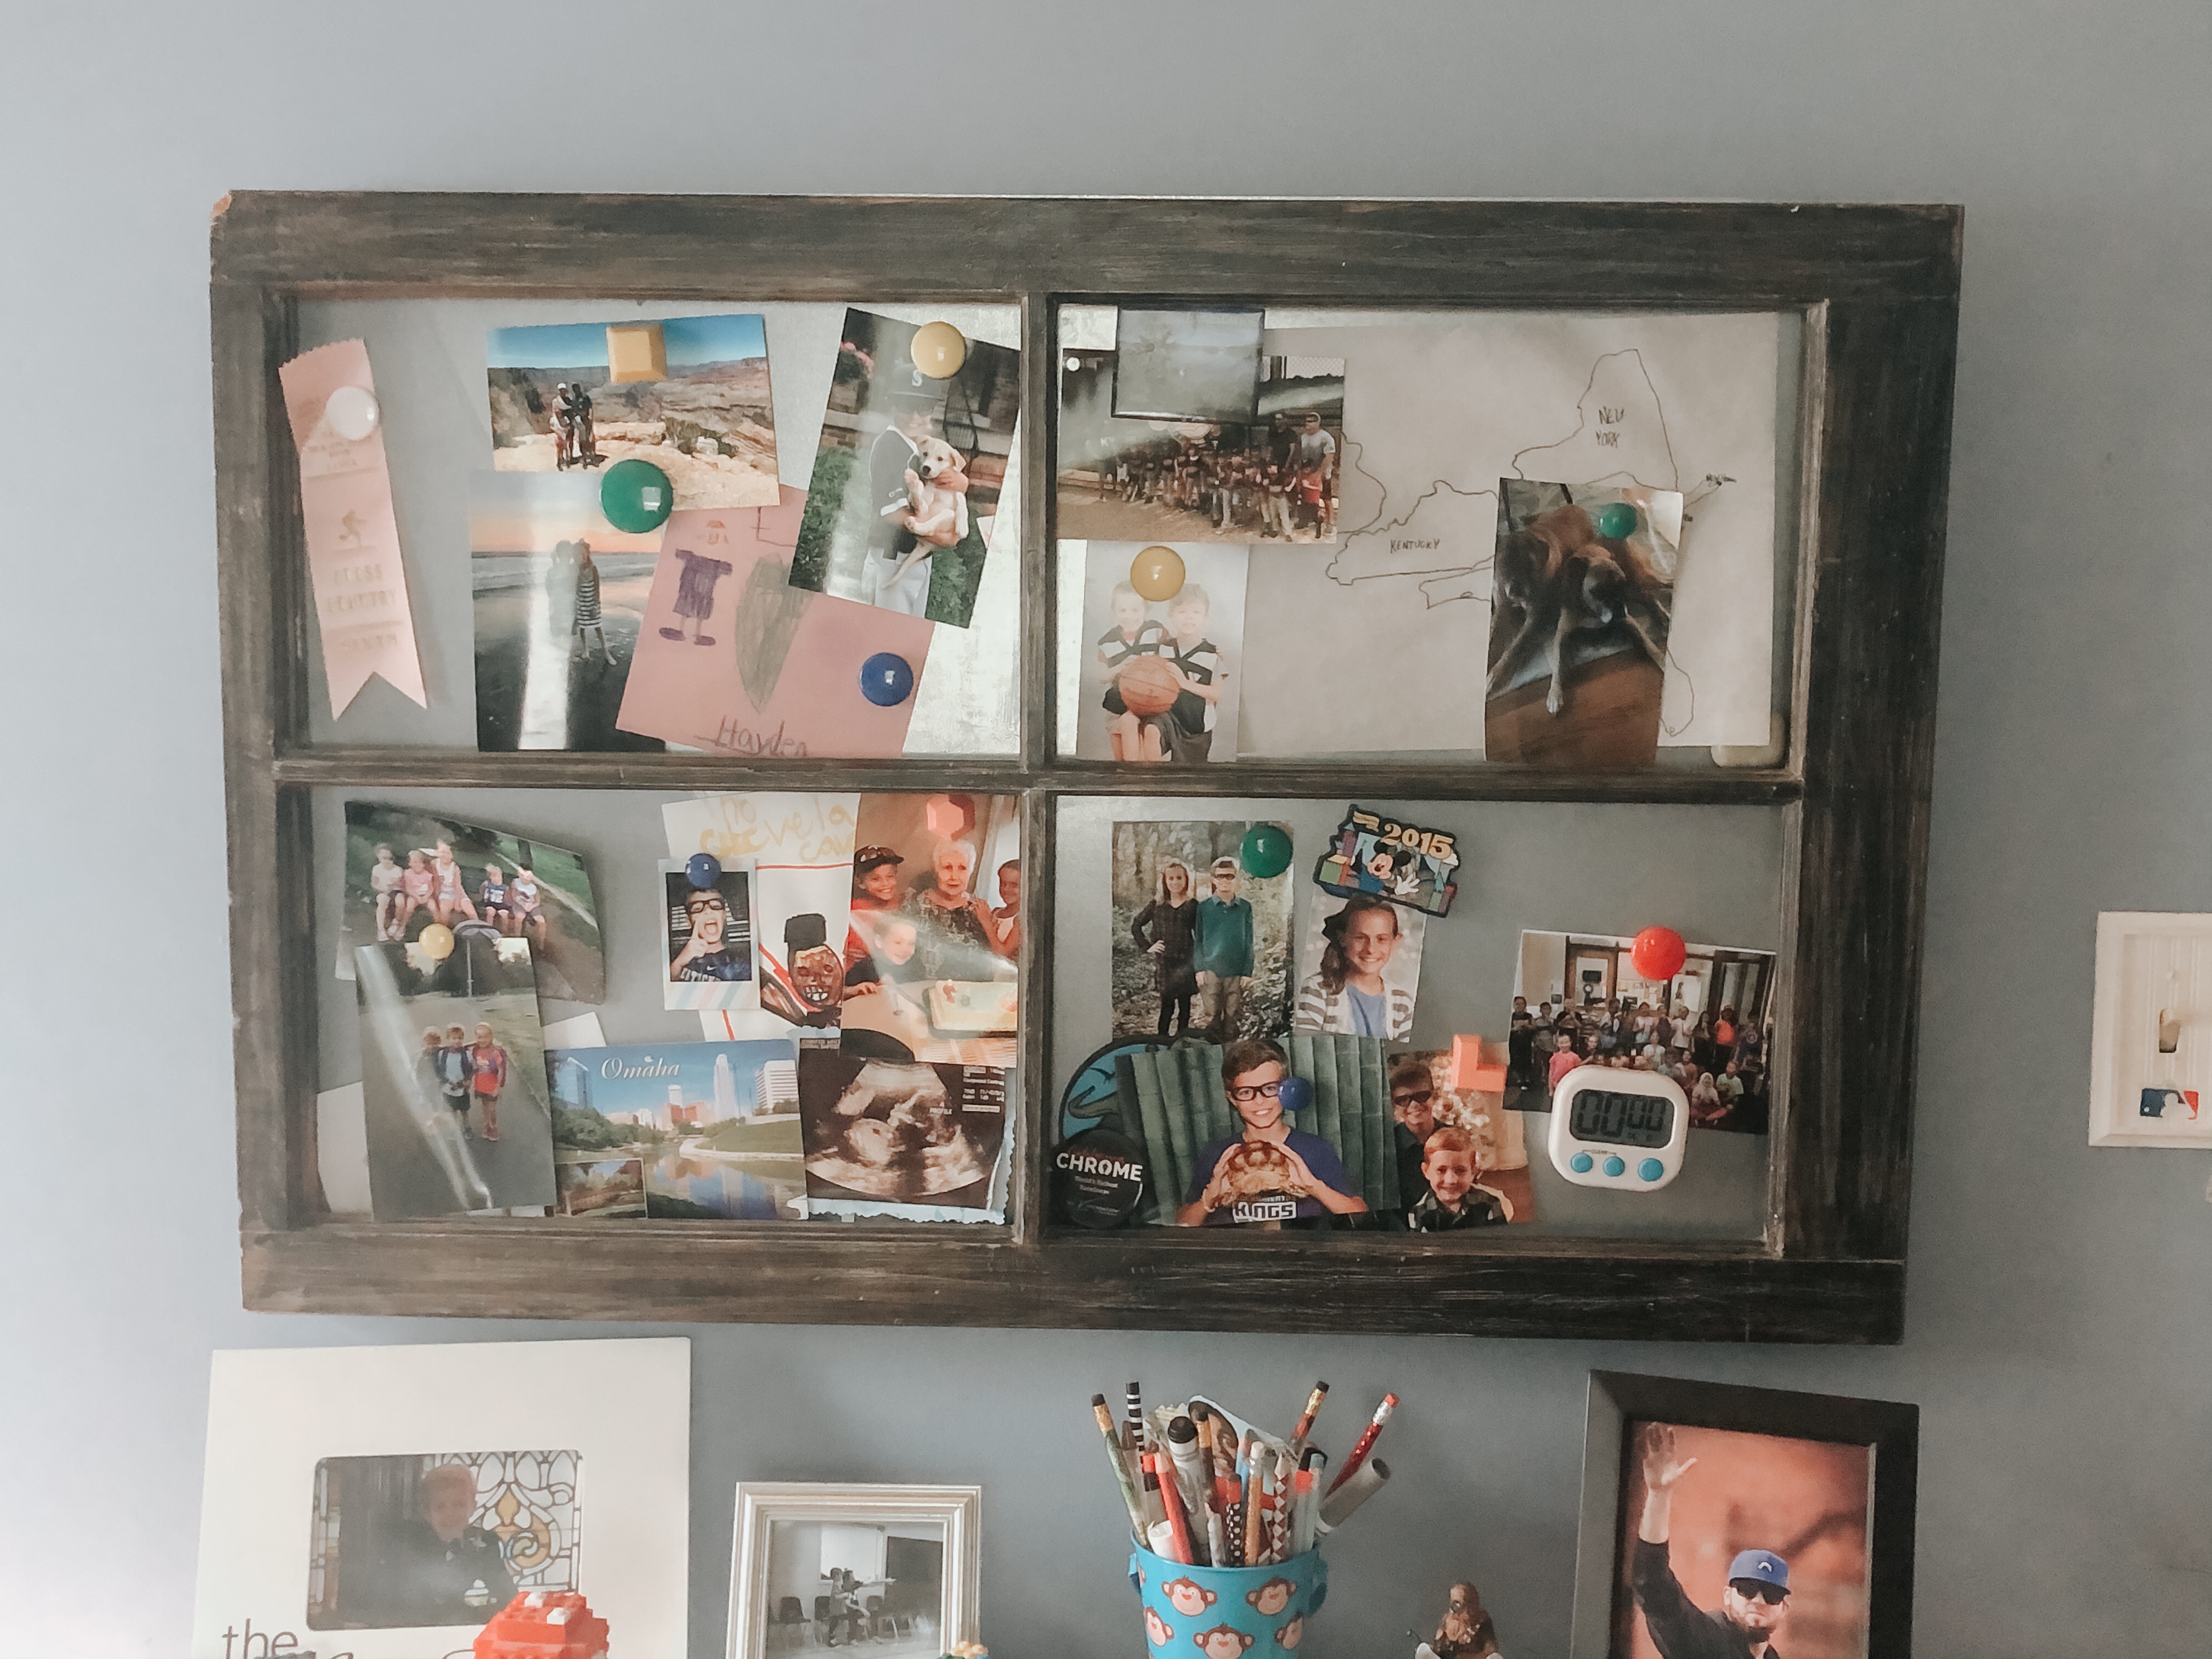
Hayden’s Room:
Travis and I completed Hayden’s magnet board when we moved into our current house. Travis had this wooden pane that he’d picked up years ago, and then I bought a piece of metal at Home Depot (or Lowes) that we cut down and then stapled to the back of the frame. Then, we hung it on one of the walls in his room.
This is Hayden’s quote canvas that I made when I made Hadley’s. The quote is from Dill in To Kill a Mockingbird (one of my favorite books!) #Englishteachernerd 🙂 and I thought it fit perfectly for Hayden because he’s always been on the smaller side (probably more average sized now) but inquisitive and pretty studious. The canvas still hangs in his room now.
Kitchen Projects:
I had seen this valance idea on Pinterest, and tried it out on the window in our kitchen. All you need is fabric and hot glue. Yep. Hot glue. I did this project in about an hour…and always thought I’d replace it, but five years later, the valance still hangs in the window.
This wasn’t a huge project, but I love it because it has a piece of the original house in it. Travis found the window at Lexington Habitat for Humanity ReStore. Then, the “shutters” are part of a swinging cafe doors that used to hang in the entry way from the hall to the kitchen area in our house. The previous owners took them down, and we found them in the garage. So, we cut them in half, painted them, and hung them next to the window on the wall.
Chalk Paint:
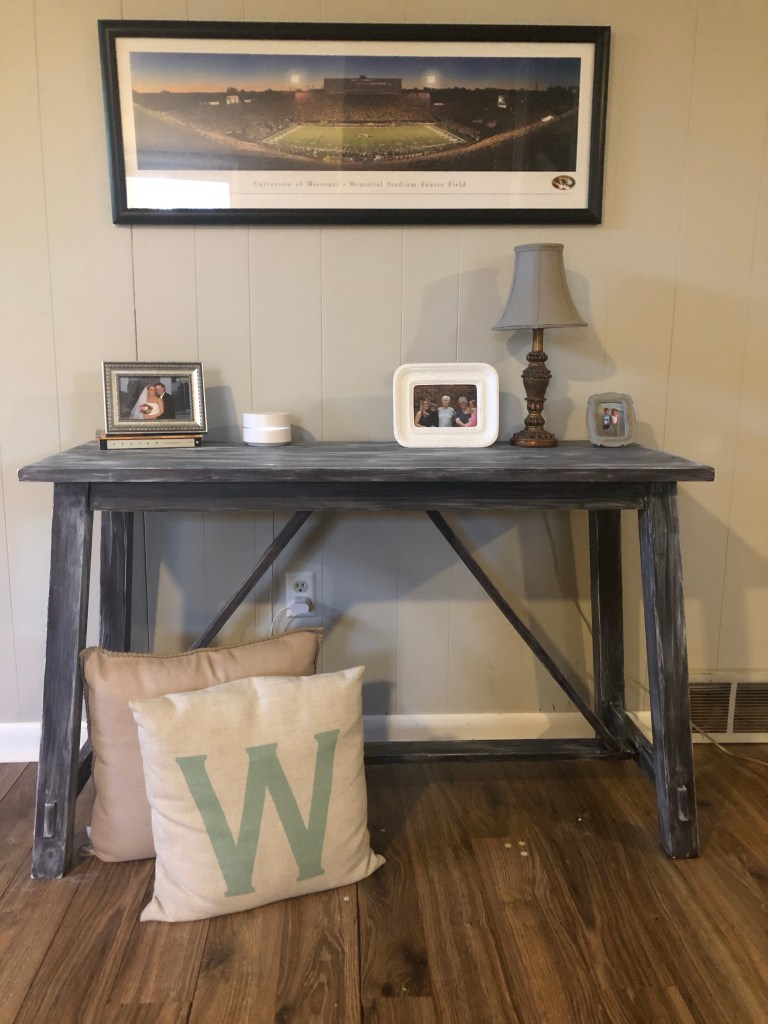
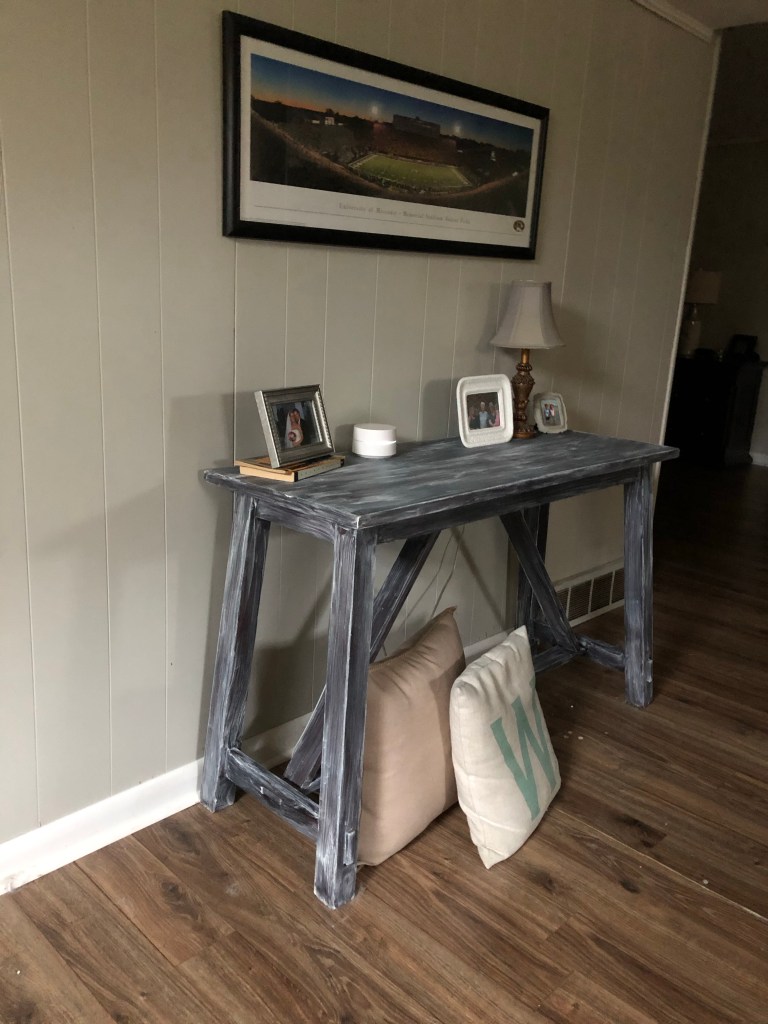
A few summers ago, I was brave enough for my first chalk paint project. I painted our entry way table with chalk paint and antiquing wax.
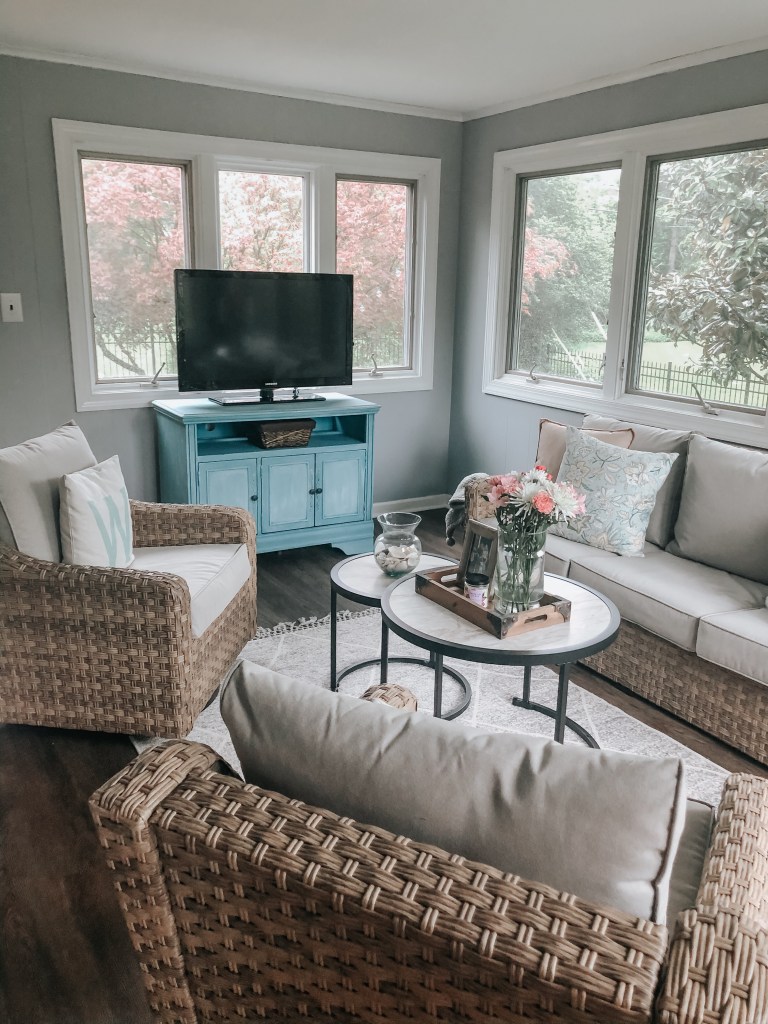
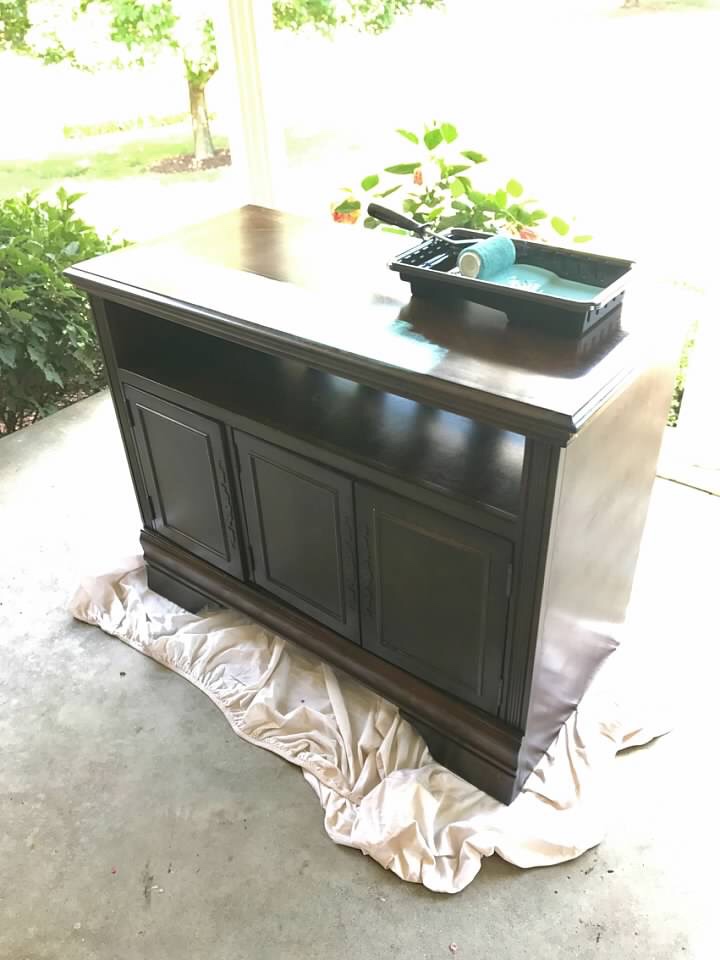
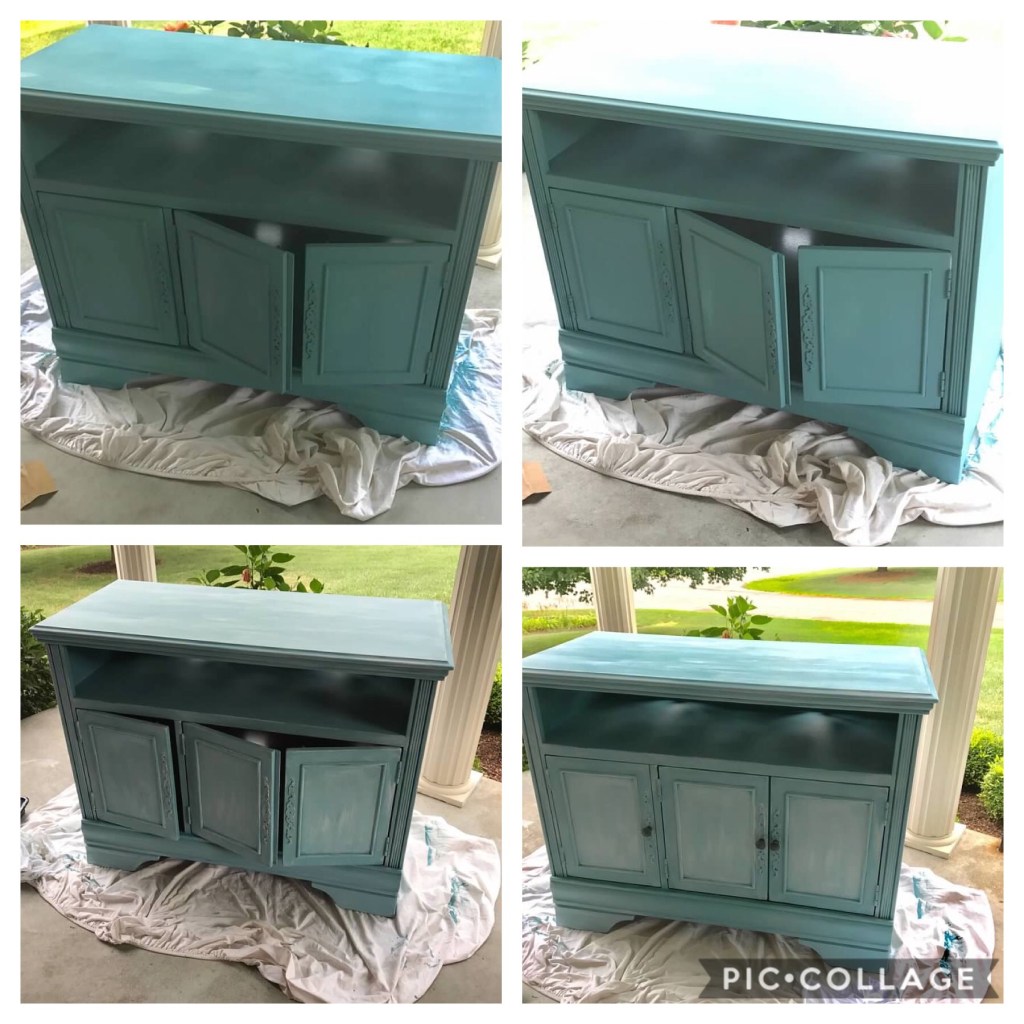
A few months later, I painted our tv stand (that we now use in the sun room) with chalk paint and another glaze.
Then, I used the Limewash Glaze on an antique side table.
Lastly, one of my first quarantine projects was that I used the same Limewash Glaze on this table in our basement.
Here are the posts I wrote about my chalk paint projects and you can see the befores and afters:
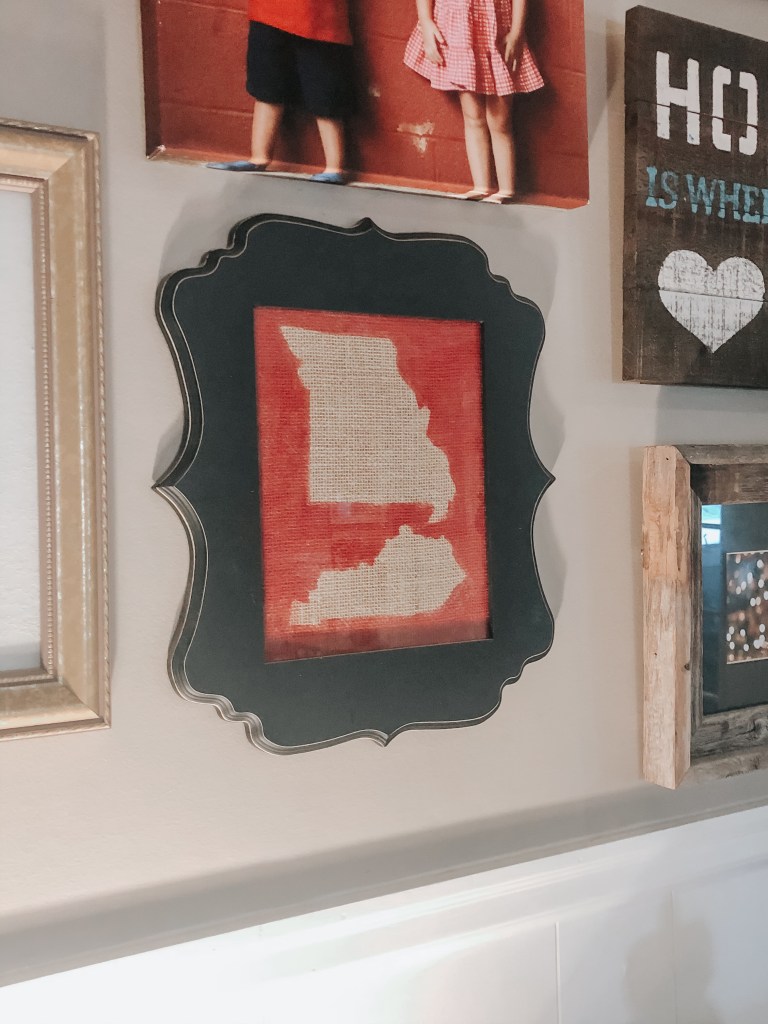
I made this Missouri/Kentucky burlap piece for the gallery wall in our former home. I included it in the gallery wall in our kitchen in this house. My former house was mostly reds and greens, so I chose the red color for the paint. I printed out the two states and laid them flat on a piece of burlap. I simply painted over them and then removed the cut outs to reveal the burlap. Then, I just put the finished burlap piece in a frame.
It’s a sweet nod to where I’m from and where Travis is from (and, of course, where we currently live)
Sometimes I’m not sure of the difference between a craft and a project. I guess projects may have more steps and take longer…so this post is probably a good mix of crafts and projects 😄Do you consider yourself to be crafty?
Next month’s topic is Shop the Holidays. It’s crazy to think we’ll soon being thinking about Thanksgiving and Christmas! (And my kids turn 11 next month…time sure does fly!)
Don’t forget to check out the other ladies’ posts! Thanks so much for reading.
So, our master bedroom has been the one room in the house that we’ve neglected. I’d kind of been holding off making decisions until I knew what we may do about an addition to the master bedroom. I think we are putting a “pin” in that for now, so I decided to move forward with a refresh to our bedroom.
This past weekend, Travis and I spent about three hours Friday night wallpapering a wall in our bedroom. Y’all, we’ve lived in our house for five years and only over this past Christmas break, we moved the furniture around a bit. We moved the bed and took off the mirror of our dresser to allow space for the television. Now we can see the tv from our bed easier and there’s more floor space when you enter our bedroom.
I follow Michelle (@ellerydesigns) on Instagram, and she’s often talking about Wall Pops. Wall Pops has peel and stick floor tiles and wallpaper. She updates her mantle seasonly with the NuWallpaper, and she’s used the floor tiles in various spaces in her home. So, I felt comfortable purchasing and attempting the wallpaper. (Also, she often has a Wall Pops code that she shares with her followers!)
I purchased three rolls of the Shiplap NuWallpaper which is exactly what we needed for this wall. Each roll was $35 on sale (usually $50), so that was a good deal. Along with the wallpaper, I did purchase the smoother and utility knife (less than $5 total) to make sure we had what we needed.
First and foremost, we are novice (very novice) wallpaper hangers…even the peel and stick kind of wallpaper. 😂I’ve seen Michelle post her videos, and I watched a You Tube video of a woman hanging her wallpaper, so I did think it would be easier than it was. Travis thought it would be a one person job. At least in our case, it was definitely a two person job. Honestly, the trickiest part was matching up (the best that we could) the lines. For example, after hanging the first strip, we realized the lines that matched up best were at the end of the roll. So, we unrolled the entire roll to find what would match best. Smoothing it out wasn’t a problem…and we can attest to the fact that the strips can be removed easily because we had to do so many times! haha.
Once we got the hang of it, we kind of got in a groove, but it definitely took longer than we thought. I think we worked on it for about three hours stopping for a few minutes here and there. Besides matching up the lines, the end piece where the walls meet was rather difficult (for us) as well.
All I know is the lady in the You Tube video wasn’t sweating and saying the occasional cuss word! 😉 When I shared the before and after pics on Facebook this weekend, I joked that we are apparently at the phase of quarantine where we decide to test our almost fifteen year marriage by hanging wallpaper on ONE wall! haha
FYI one roll provided about two strips with maybe a bit extra.
Overall, we were very pleased with the outcome, and it was a very cost effective transformation.
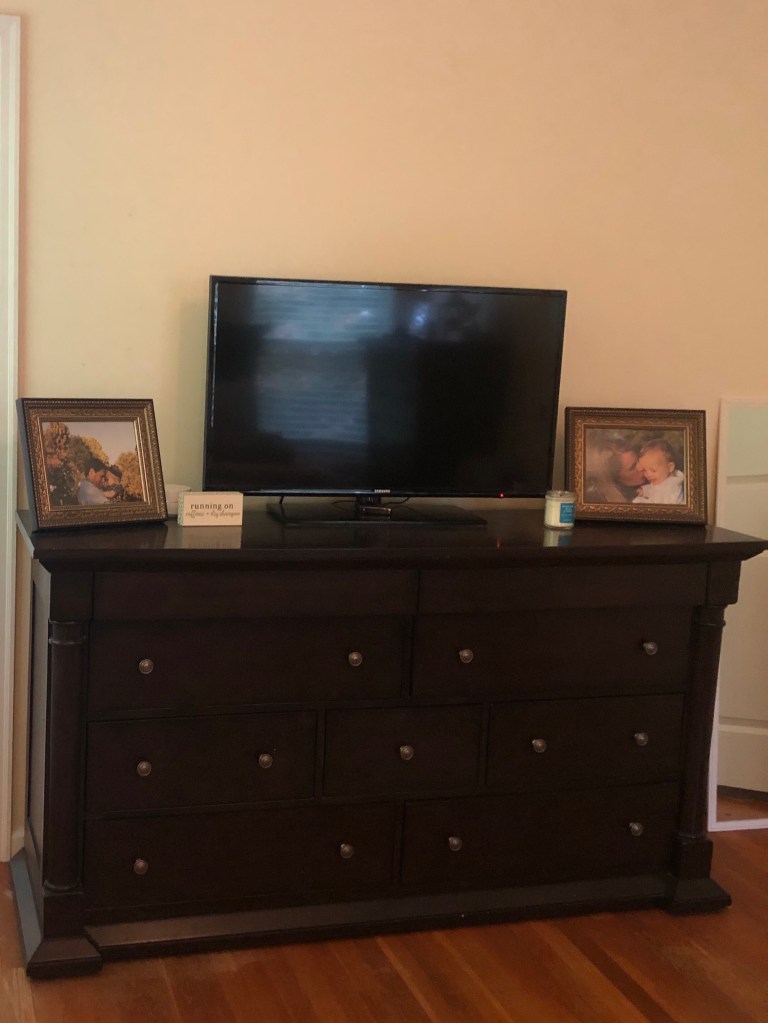
Before:
The entire house was painted this tan/yellow color, but, like I said, our room was the only room that hadn’t been painted.
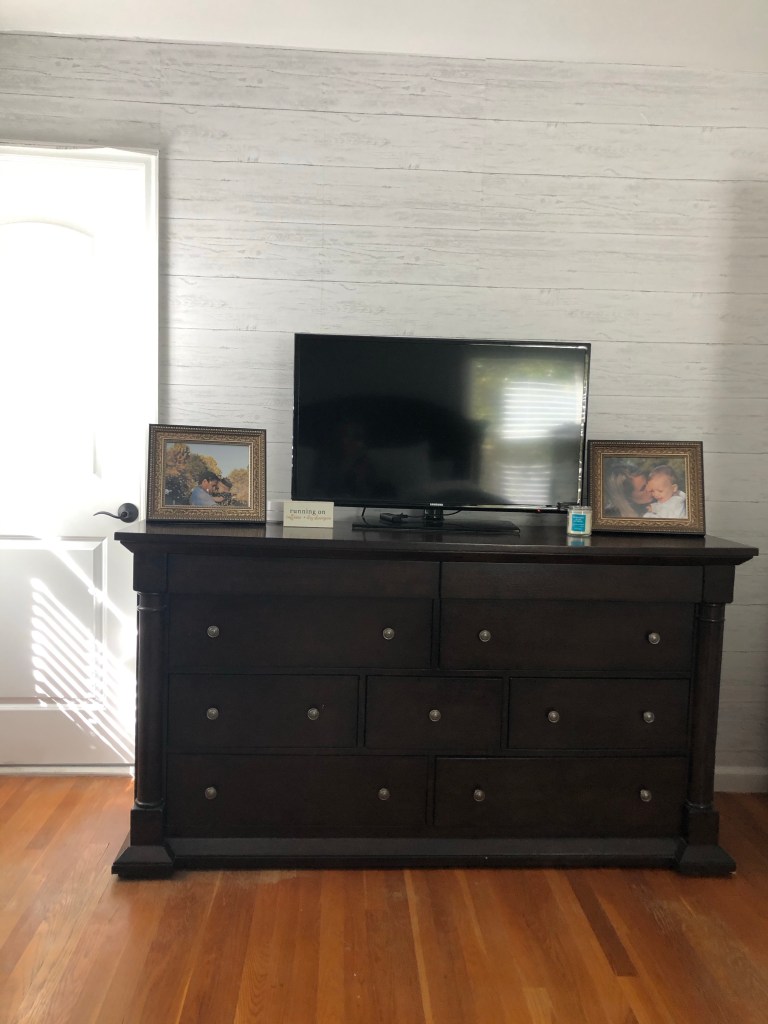
After:
The next morning, the daylight, confirmed how much I loved the final outcome. Also, we had thought about putting the wallpaper on a longer wall in our room, but I am glad we went with the smaller wall. The final outcome added just enough “pop” in the room for our refresh.
Close up
Then, on Sunday, Travis (and Hadley!) painted our other three walls Repose Gray which is what we used in most of our main living spaces in our house. I also found some new bedding for us from Chip and Joanna’s Hearth and Home line at Target. Lastly, I hope to hang a few pics of the kids’ artwork in our room for a gallery wall…and then this refresh will be finished!
Even though the project took a bit longer than I thought it would, I would still do it again. I was thinking of maybe letting Hadley pick out a design she’d like on ONE wall in her room 😉
Hello and happy Monday. With some extra time on my hands, I recently tackled another quick chalk paint project minus the actual chalk paint.
As I’ve mentioned before, I went through a phase of buying more traditional furniture, most of which was dark wood. This console table has been a basement piece in both our previous and current home. It didn’t bother me how it was, but I knew I could use the LimewashGlaze to freshen it up a bit.
Before:
Hadley helped me move the table into the garage, so I could paint it.
Now, Limewash glaze is usually a top coat after painting with chalk paint. But, I didn’t have a color I wanted to commit to, and have used only the Limewash in the past.
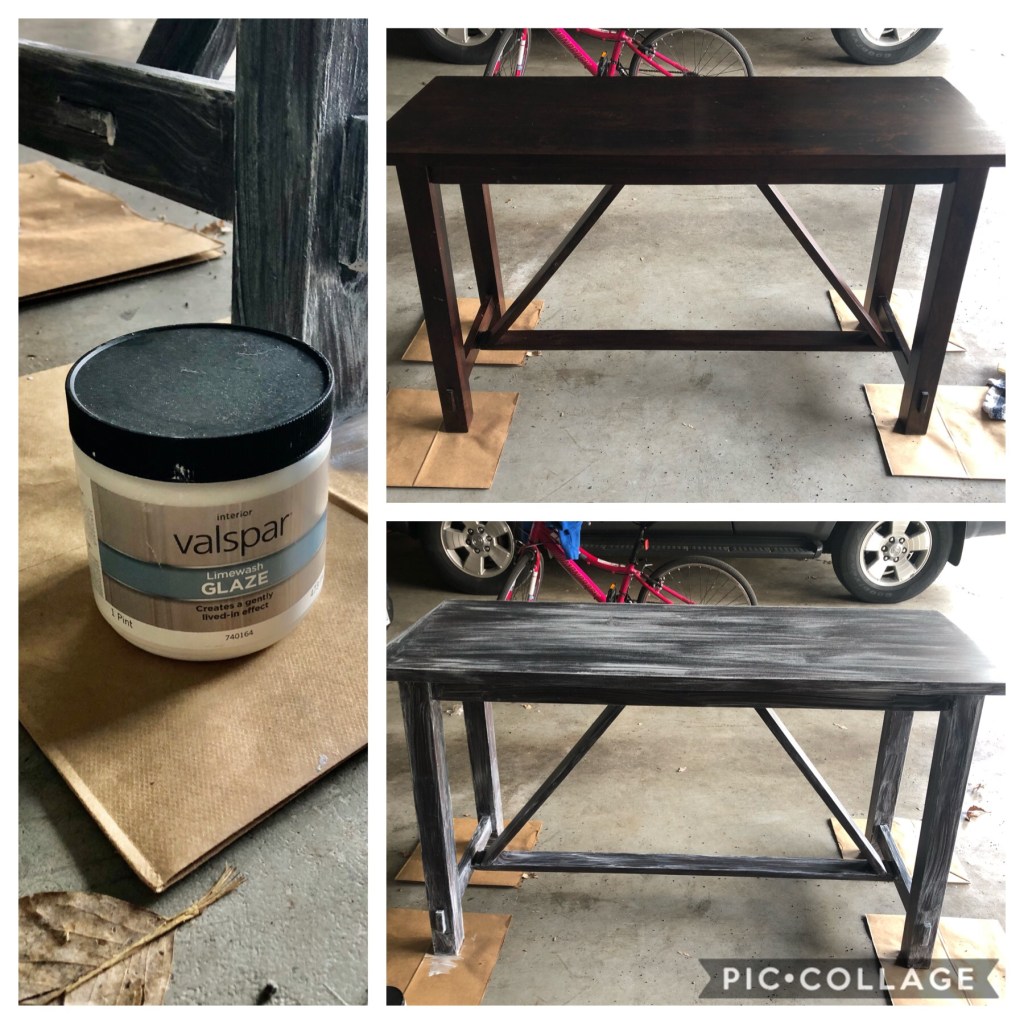
I started by wiping down the table with a dry cloth to get rid of the dust bunnies. Then, I used a paint brush to paint on a coat of glaze.
Vertical pic: Limewash Glaze; Top pic: ready to be painted; Bottom pic: one coat of glaze
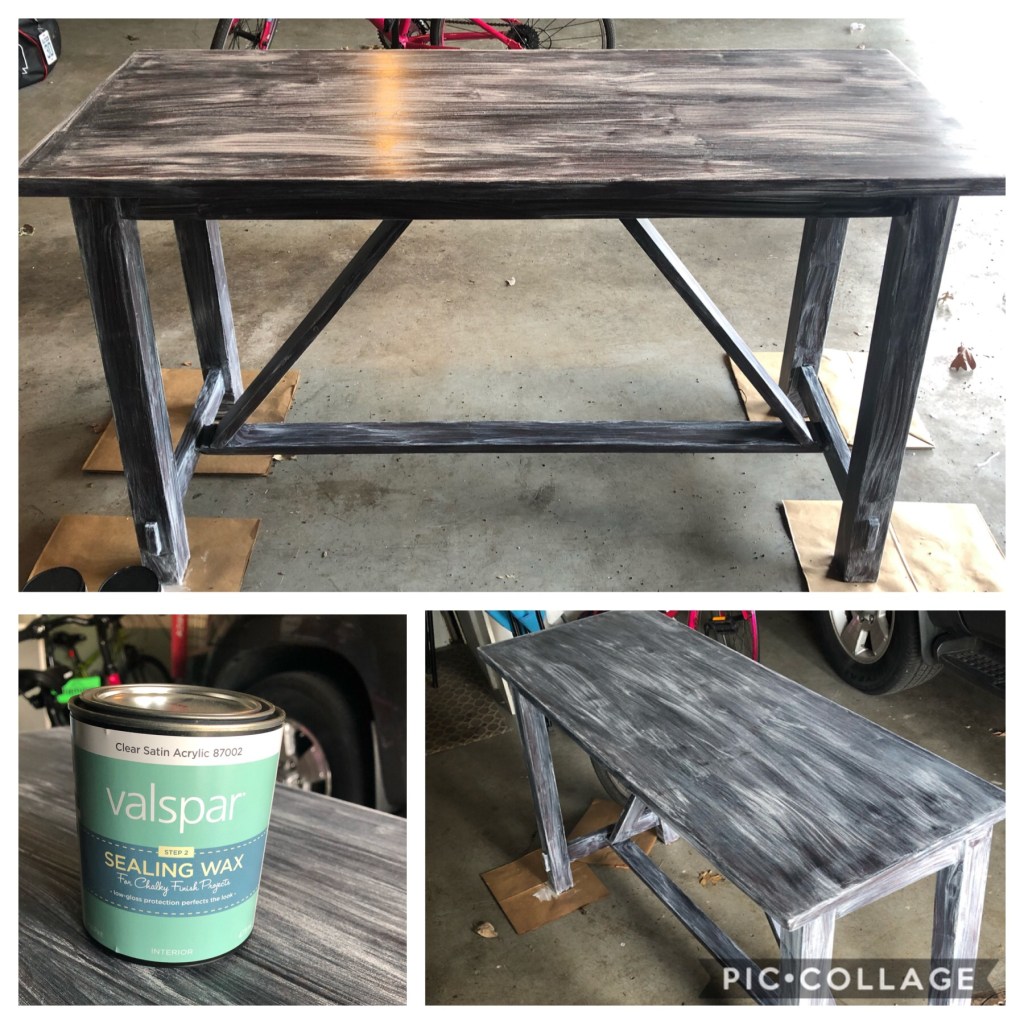
I wasn’t sure how many coats would be needed, and to be honest, some purplish undertones appeared after just one coat. So, I decided to paint one more coat of the Limewash Glaze on all parts of the table.
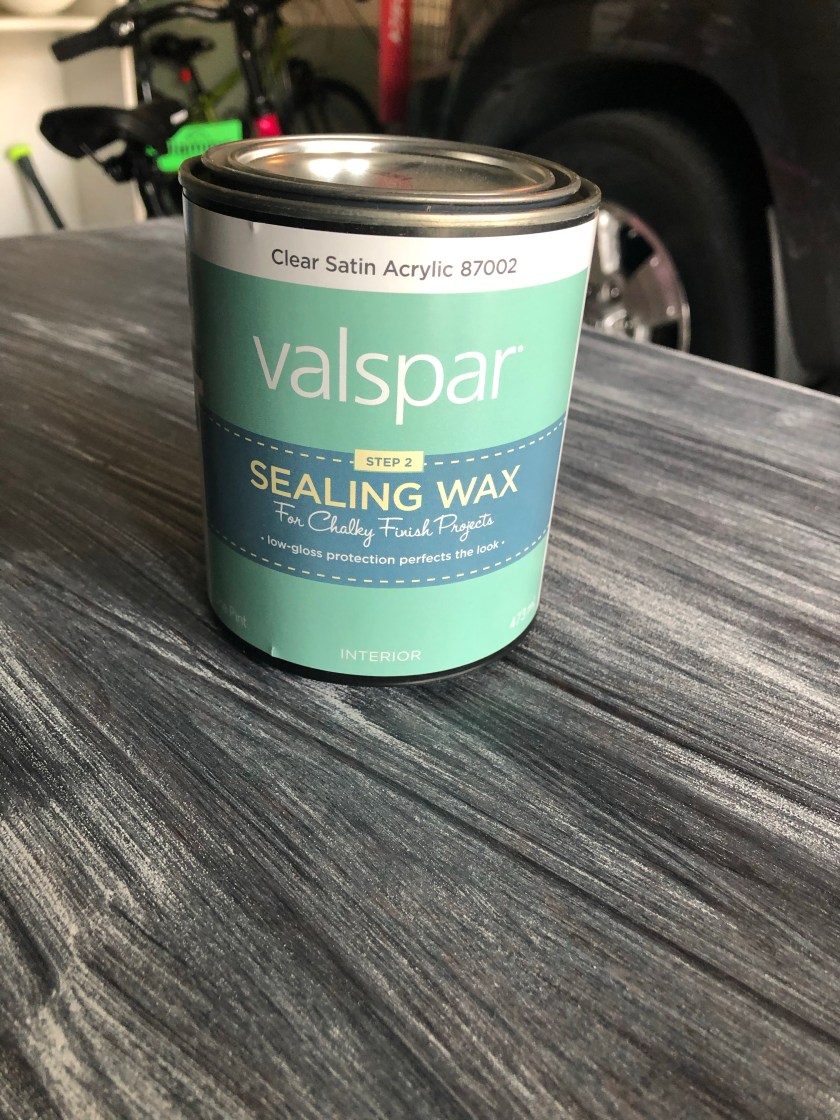
Then, I put a coat of Sealing Wax only on the top of the table. Again, I’ve painted pieces before and skipped that final step, but I went ahead and did it this time.
Top pic: after second coat of Limewash Glaze; Bottom left: sealing wax I used after painting; Bottom right: after being sealed
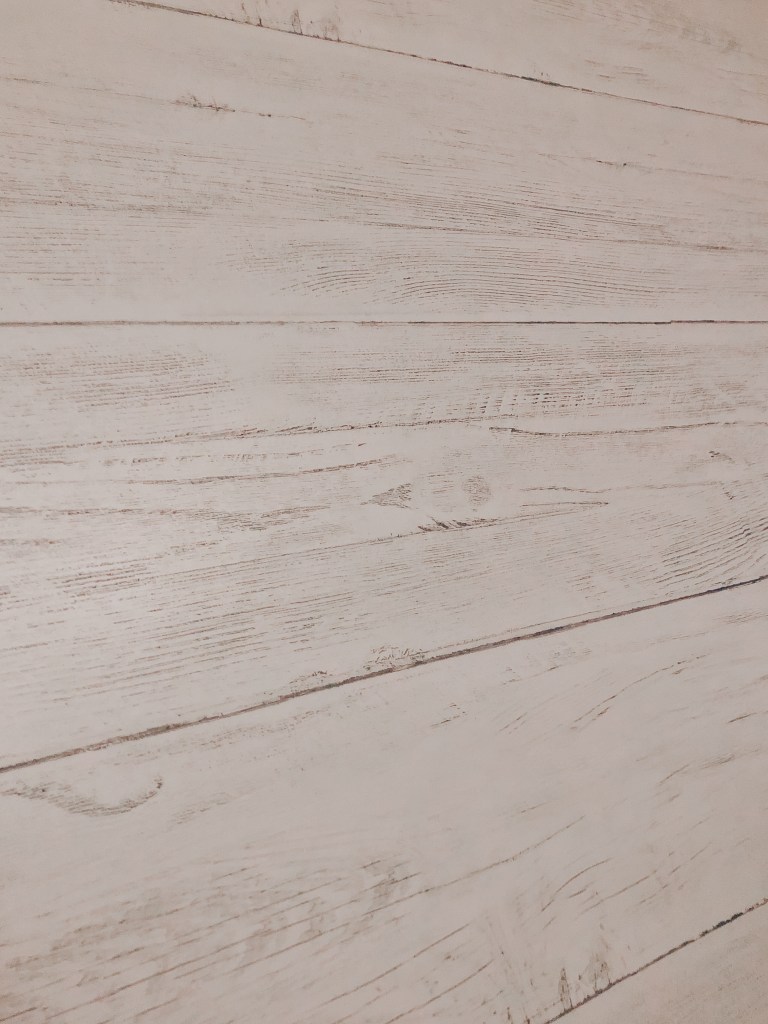
After:
The table is back to it’s original spot. The whole project took about two hours. I did let everything dry overnight before moving the table from the garage to the basement again.
Closeup of the Limewash Glazed brushstrokes.
I snapped this pic a couple of days later when more natural light was shining in the basement.
That’s it! A pretty easy project from start to finish. The Limewash Glaze updates this piece I already had and makes it more my style!
Check out my previous Chalk Paint post if you missed it last time.
I’m off to home school a couple of kiddos while working from home! Wish me luck!
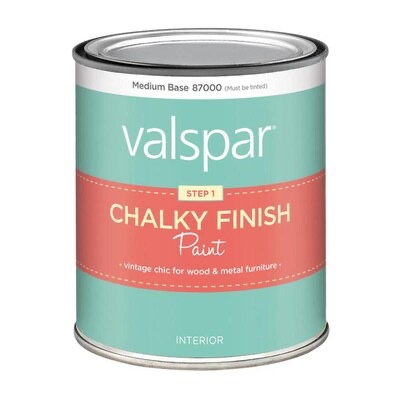
While I’m not super crafty, I like a quick project with major impact. Thanks to Pinterest, I have found myself pinning different ideas that involve chalk paint. I had always heard that chalk paint was a pretty easy product to use…and what had previously held me back from painting was thinking of all the prep work before even getting to paint (like priming the piece beforehand). A couple of summers ago, I was at my friend Krista’s house, and she had just used chalk paint on a buffet for her porch. It looked amazing. She told me about the Valspar paint she used from Lowes. After a visit to Lowes to pick up the pamphlet, I decided to take the plunge and paint the console table in our entry way hall. The table isn’t an heirloom and was a cheap purchase years ago. I figured if I messed it up, it wouldn’t be the end of the world!
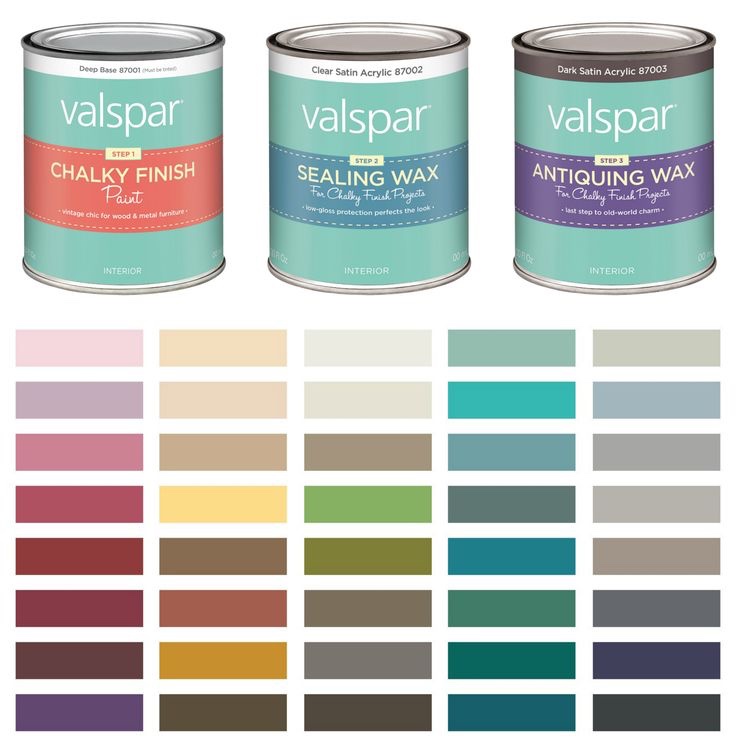
This is the Valspar Chalky Finish Paint. There are many color options. What you do is wipe down the piece you want to paint, paint 2-3 coats of the paint (and each coat dries very quickly) and then choose a finish. I’ve used the Antiquing Wax and Limewash Glaze for finishes. Then, you can paint a coat of their Sealing Wax to finish off the piece.
FYI for all projects, I used a roller for the paint and a brush for the wax or glaze.
Console Table
This is a random picture of the entry way console table.
I choose the Theater Wrap paint color with the Antiquing Wax for the finish. This was my first project…and I will say that after completing my other two projects with the Limewash Glaze, I found it to be much easier than the Antiquing Wax. That being said, practice makes perfect and I got the hang of using the wax as time went on.
For the console table, I used the roller to paint the Theater Wrap color and did two coats. After it dried, I started with the top of the table and the Antiquing Wax. My friend had told me how she painted the wax on with a brush and then wiped it with a towel or old t-shirt. After a couple of tries, I panicked and called her! She came over and showed me what to do. The reason I panicked was because the wax goes on dark…and it’s easy to see the brush lines where you leave off…I was worried everything wouldn’t blend. Anyway, if you want the color to be darker, you leave the wax on a little longer. Again, though, I brushed it on and almost immediately wiped it off using a towel. I rubbed in extra wax on the corners to make those areas darker. As you can see from the picture below, the top of the table is darker which is what I wanted. Also, there were times I put some of the wax straight on the towel and rubbed on certain areas. Once I got the hang of brush on the wax, wipe off the wax, and rub in the wax, it wasn’t that difficult.
This project took a couple of days off and on. I did the chalk paint one day and the wax finish another day. Also, I did not use the sealing wax to finish everything off. A couple years later, the piece still looks the same….and gets dusted every other week or so with no issue 😉
TV Stand
The TV stand was a QUICK project. I used a roller to paint on the Beaded Reticule color. I did two coats of the paint. Then I used a paintbrush to apply the Limewash Glaze which was SO EASY to apply. Again, I didn’t use a finishing wax to seal the entire piece because, again, the stand doesn’t get used besides a tv sitting on top of it! I completed this entire project in a couple of hours.
Before the paintTop left: one coat of paint; Top right: two coats of paint; Bottom left: limewash glaze coat one; Bottom right: I used my brush to use more limewash glaze on the front panels.Finished product
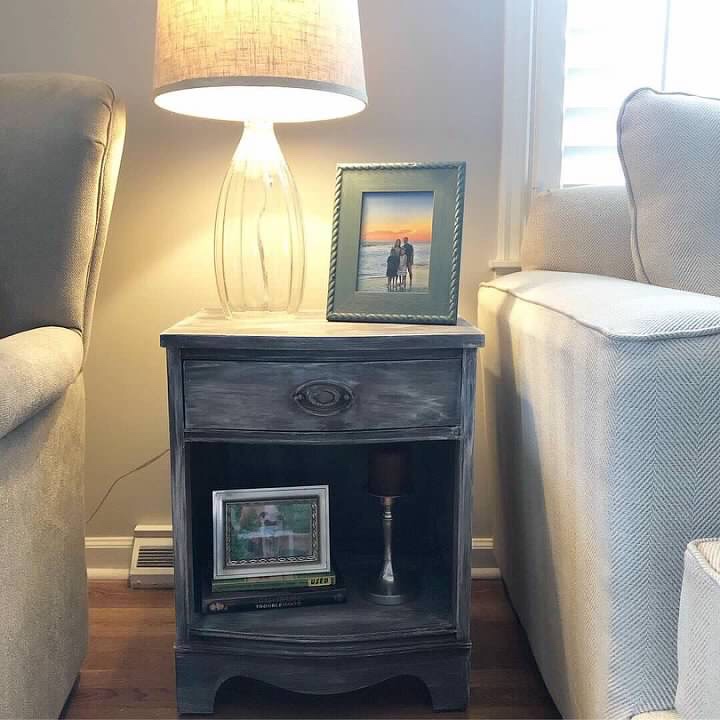
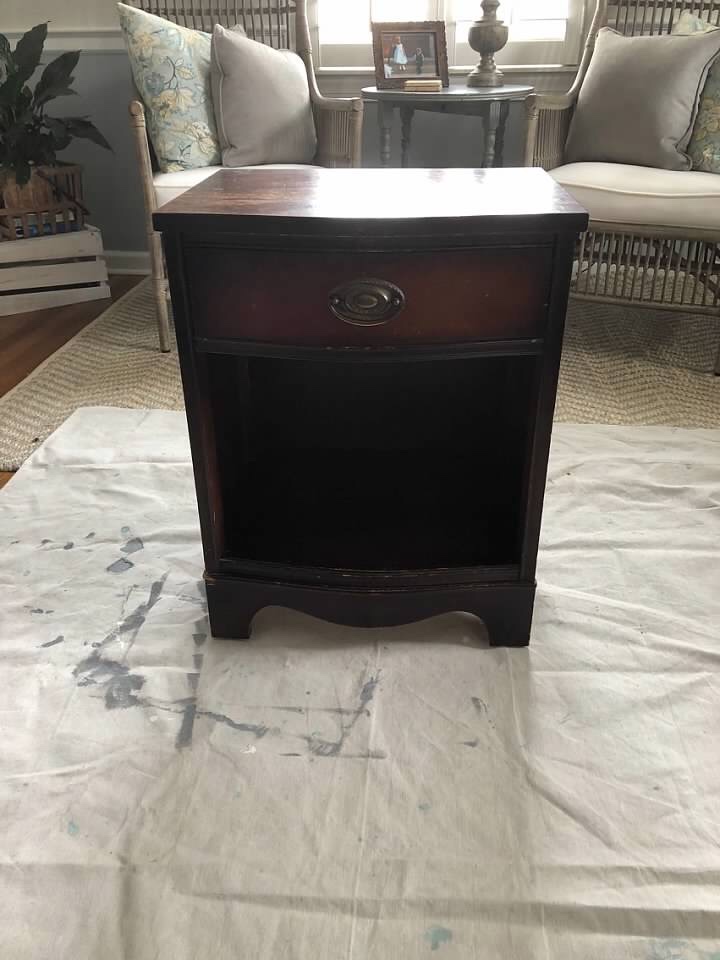
Side Table
When we got our new couch about a year ago, we needed a smaller side table between the couch and the chair in the living room. I’d had this piece from when my dad was a kid (which I believe he used as a bedside table) and have used it here and there throughout our homes.
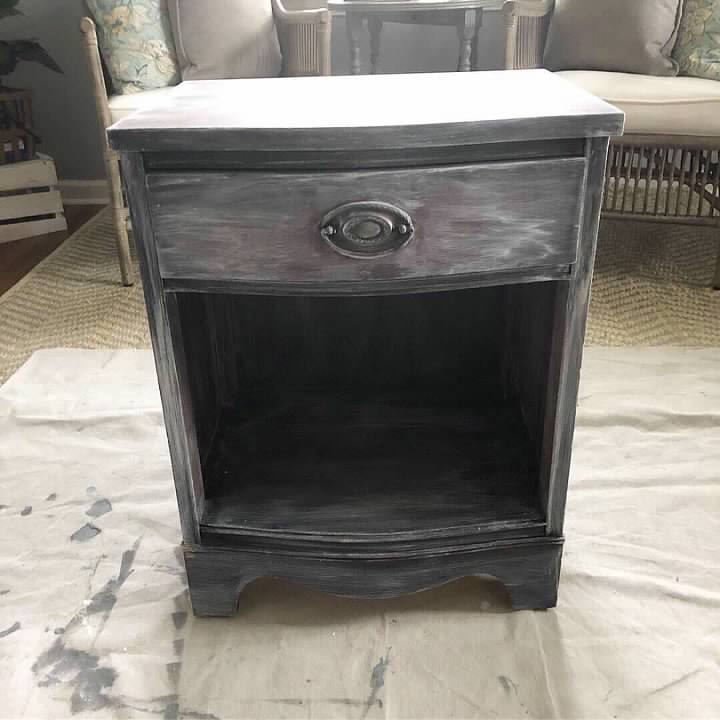
For this piece, I only used the Limewash Glaze. Since it is an older piece and holds some meaning to our family, I just wanted to lighten it up and not paint it. So, I took a brush and the Limewash Glaze to give this piece a face lift. I just used the brush and painted the glaze on. I did end up applying a few coats depending on how the glaze took to the wood in certain areas.
This is the one project I did use the Sealing Wax on because I knew the table would get a lot of wear and tear with us using it to place our drinks. I did two coats of the Sealing Wax to complete the project which took just under two hours from start to finish.
To be honest, I was tempted to take the Limewash Glaze to all the dark furniture we still have left (like our master bedroom furniture) but decided to hold off…but that may be a summer project for me!
BeforeAfter
It’s been about a year since I painted my last piece, but I may try to paint some more this summer. I’ve always had a dream of buying old pieces, bringing the back to life with some paint and then selling them on Facebook Market Place. We’ll see. Summer would be about the only time I’d have to work on those kinds of projects…and even the summer days seem jam packed!
If you are scared of tackling a painting project, chalk (chalky) paint is the way to go.