The home renovation posts continue with how we updated our Master Bathroom. This is the bathroom right off our bedroom (obviously!) It’s very small. Travis and I have lived in three houses together and never shared a bathroom until this one (as far as for getting ready purposes). Once we updated the basement bathroom, he did move down there as he moved his clothes to the closet down there as well. So that freed up some space and is a time saver in the mornings!
Anyway, as I’ve mentioned before, we have plans for an addition. If/when that happens, this would become Hayden’s bathroom. So, the updates are quite nice, but we did keep in mind that some day teenager Hayden may have this bathroom, so we didn’t totally bust the budget with super fancy upgrades.
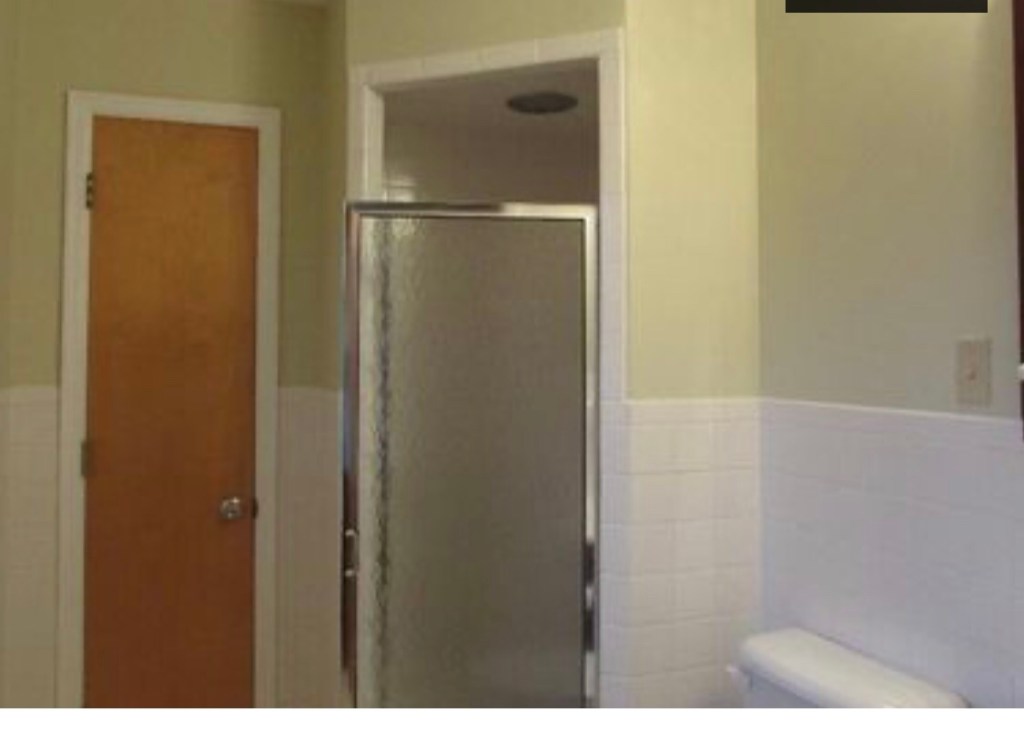
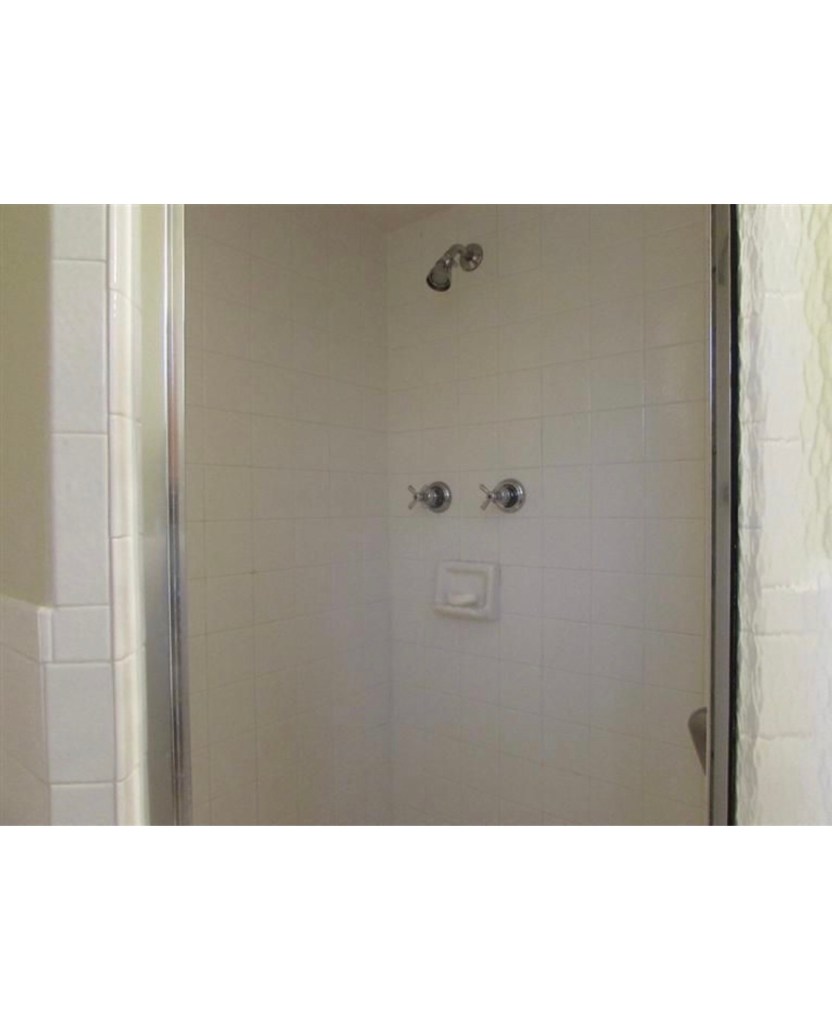
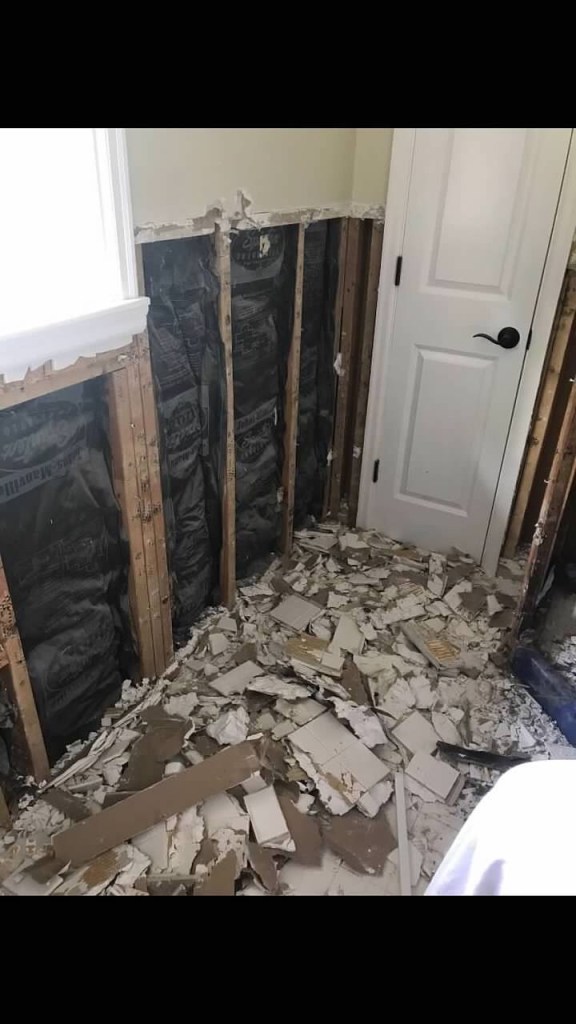
Before:
The pics from the listing aren’t the best, but you can see there’s a small linen closet with a closed in shower, and then toilet and vanity are to the bottom right of the photo.
Also, random note—I don’t think I mentioned it in previous posts but all of our interior doors were very dated. We lived with them that way for quite some time because, as we learned, hanging and painting doors is tedious and somewhat expensive work. A couple of years ago, we finally had that project completed with new doors and handles. (Older doors that we had throughout our house pictured above…updated doors in the demo pic below)
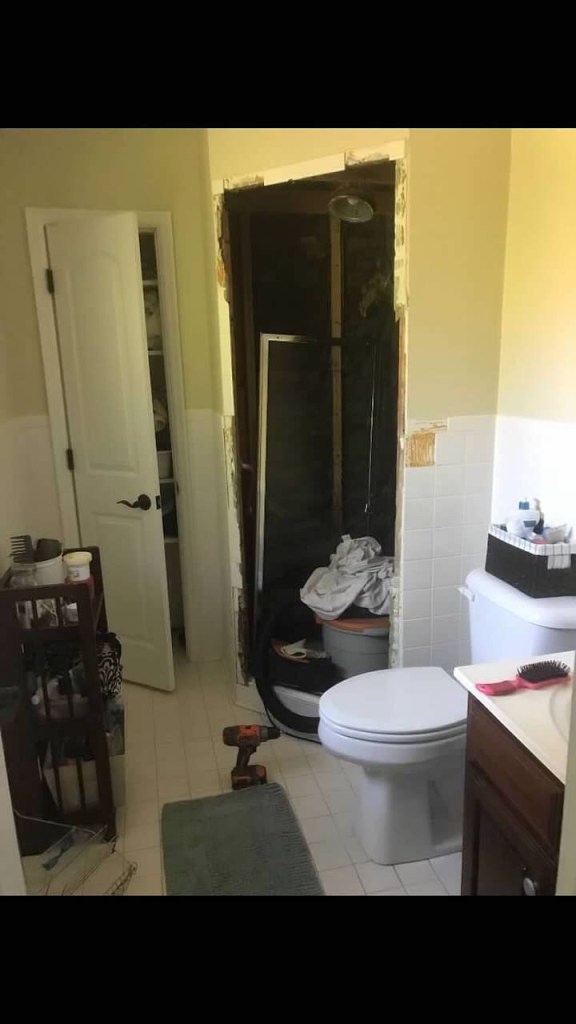
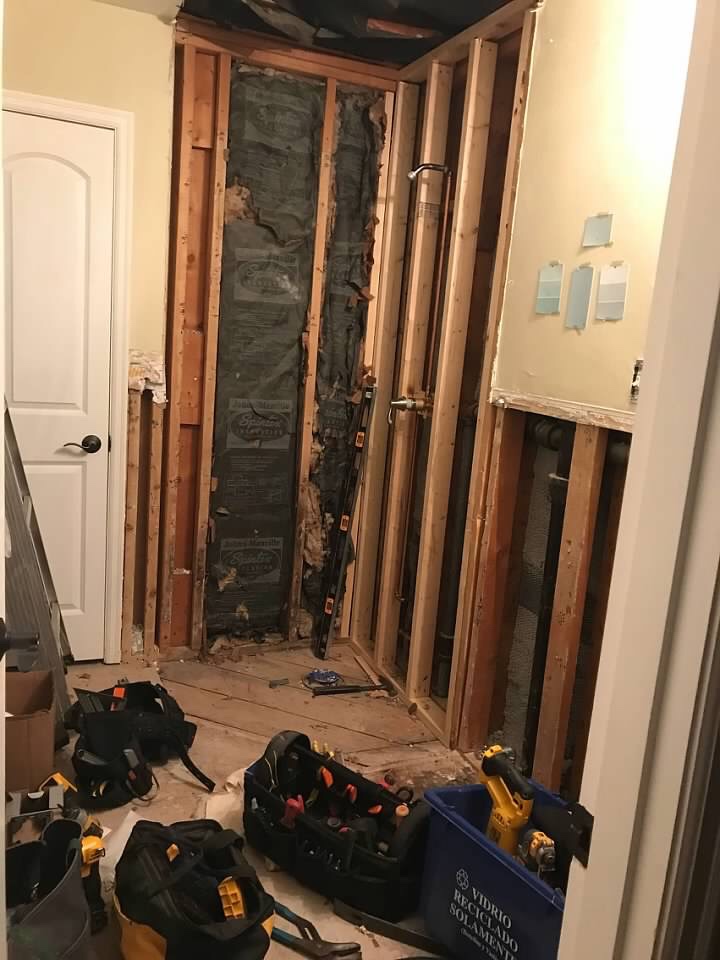
As with most of our previous updates, Travis did the demo, we both made design decisions, and then our handyman neighbor completed the detailed work.
Here’s where the pieces of the puzzle started to get put back together…
We went with gray and white tile and gray vanity to keep the same color scheme throughout the house.
I had forgotten all the decisions that have to be made in these renovation projects until I looked at this floor pic…We even had to choose the grout color! (And at one point, we had to decide which way the tiles looked best–vertical or horizontal)
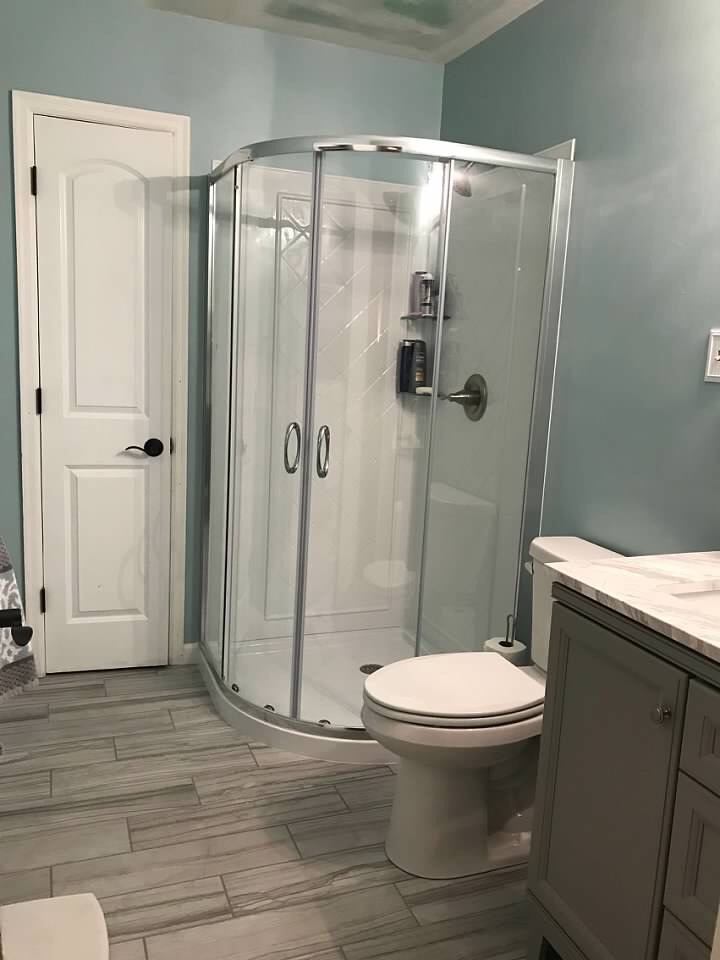
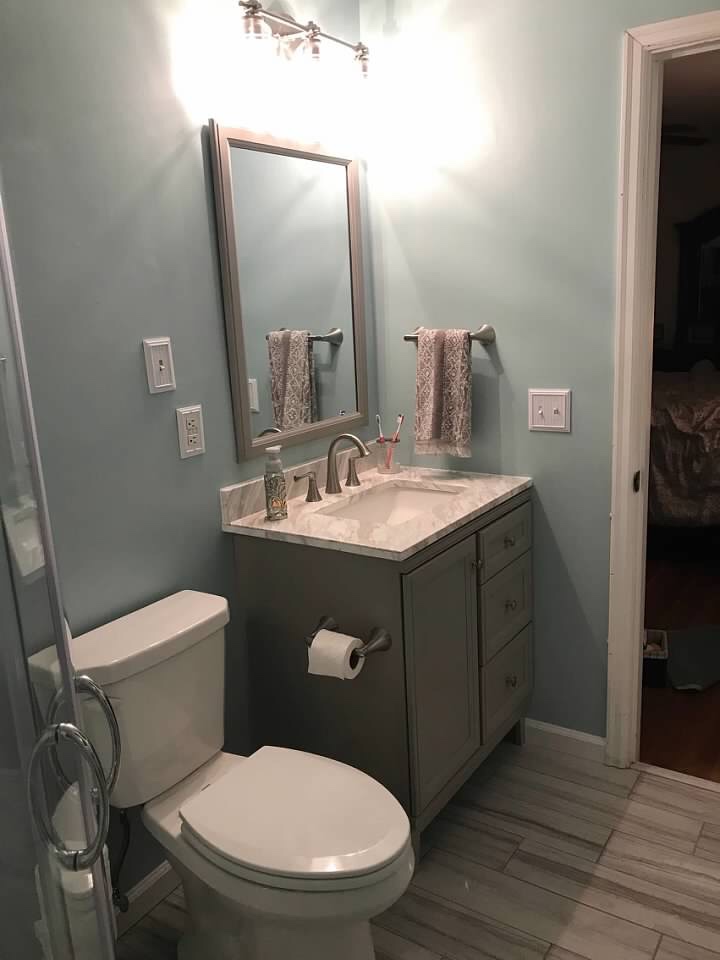
After:
As with most of the work we’ve had done, we purchased most everything (lights, tile, vanity, shower, etc.) from Lowes or Home Depot. I was trying to shake my gray colored trend and truly thought we’d get a white vanity, but saw this one and loved the counter top. Again, I love the mix of grays and whites.
This curved shower door was such a vast improvement. The bathroom looks so much bigger! Our neighbor, who did the work, pointed out that we could get the plastic insert with detailing to look like tile, and I’m glad we went that route. It elevates the look a bit.
I wish I could remember the wall color but I wanted a light color for the bathroom but also a cool toned color. All of our other walls in our house (besides the kids’ rooms) are Repose Gray or Pavilion Beige.
The two drawers of the vanity have been so helpful as I’m able to store so many more items that I used to have to put in bins and other shelves. The vanity (and the linen closet) provide all the storage I need as well as storage for towels, medicine, and other necessities for the family.
The whole project took a few weeks and we were very pleased with the outcome.
As far as major updates, we only have our hall bath left to complete. It’s the world’s smallest bathroom with a less than ideal set up as both kids use it to get ready in the morning! haha
Hello and Happy Tuesday! For this TransformationTuesday, I thought I’d share about how we updated our basement. I’ve also shared posts about the basement bathroom, our living room/office area, and our kitchen space as well.
So, even with the updates, to me, the basement is still the basement. I just mean it’s still the space where clothes stay until they are folded, school work goes until I have time to sort it, Christmas decorations still pile up until we have time to deal with them, etc. That being said, by painting the paneling, changing out the flooring, and adding some recessed lighting, the space is certainly brighter.
After living in our house for a few months, Travis and I (mostly Travis) painted the paneling one of our shades of gray.
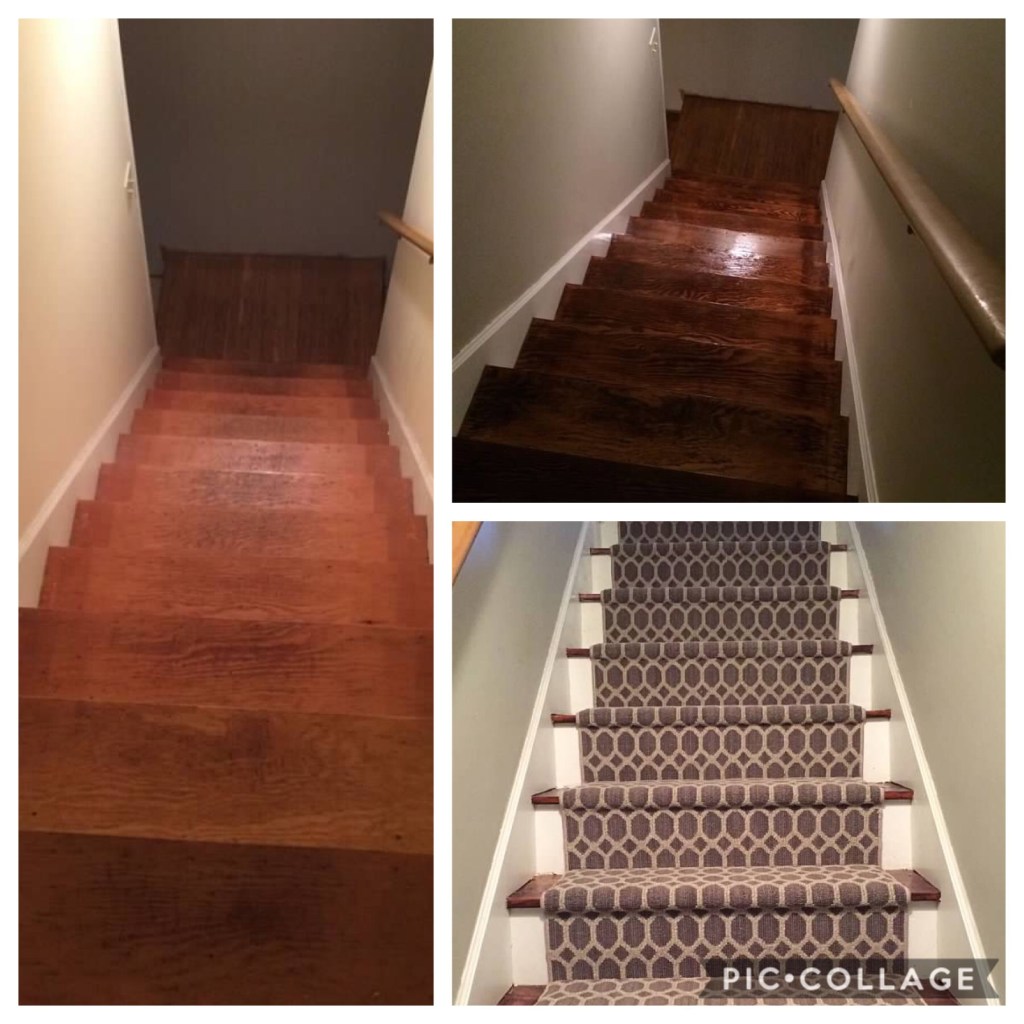
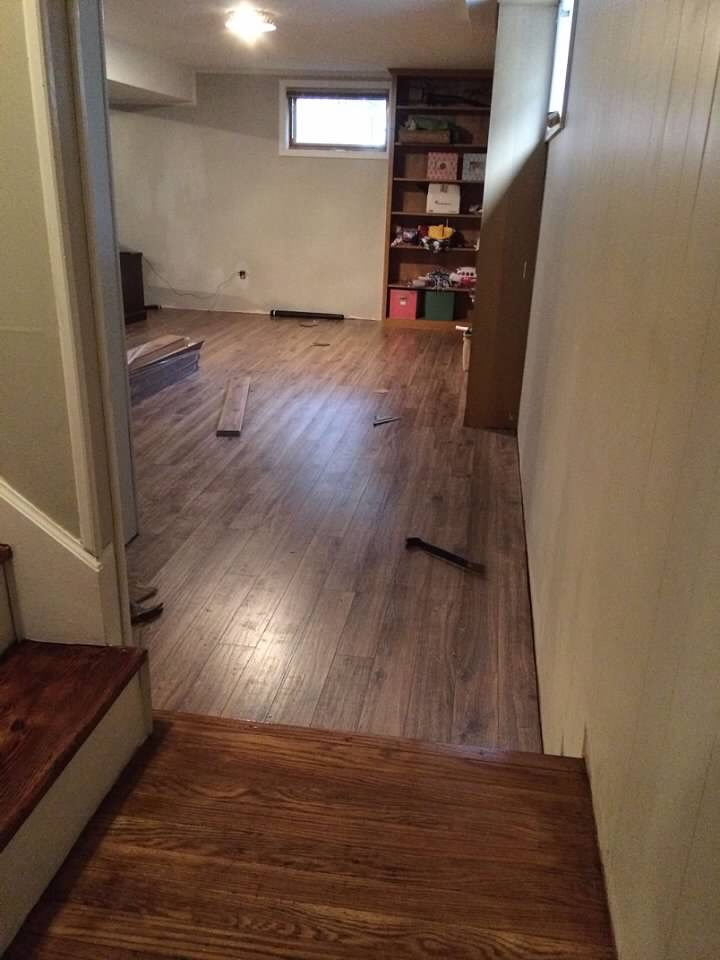
The original beige carpet on the stairs had seen better days. So, we had it ripped up and we hired someone to sand and stain the stairs. They were beautiful, and we left them as is for awhile. The problem was that we come and go from the basement as we have a raised ranch home. So, the stairs were pretty noisy. So, Travis painted the backs of the steps (and the walls leading down to the basement), and then we chose carpet for a runner. It’s definitely quieter as we go up and and down the stairs daily, and I love the pattern of the carpet that we chose from a local carpet store.
Then, a few months later, we had the flooring changed out. Our neighbors (who are our friends!) had the same flooring. It’s difficult for me to make decisions sometimes, so I love when I just see something I like that will work. The flooring is from Lowes, and it is Allen+Roth Weathered Oak.We went with the laminate flooring in case the basement ever floods, and it’s a high traffic area; we come and go through the basement multiple times a day.
The basement bathroom that we had remodeled is to the left off the basement stairs landing
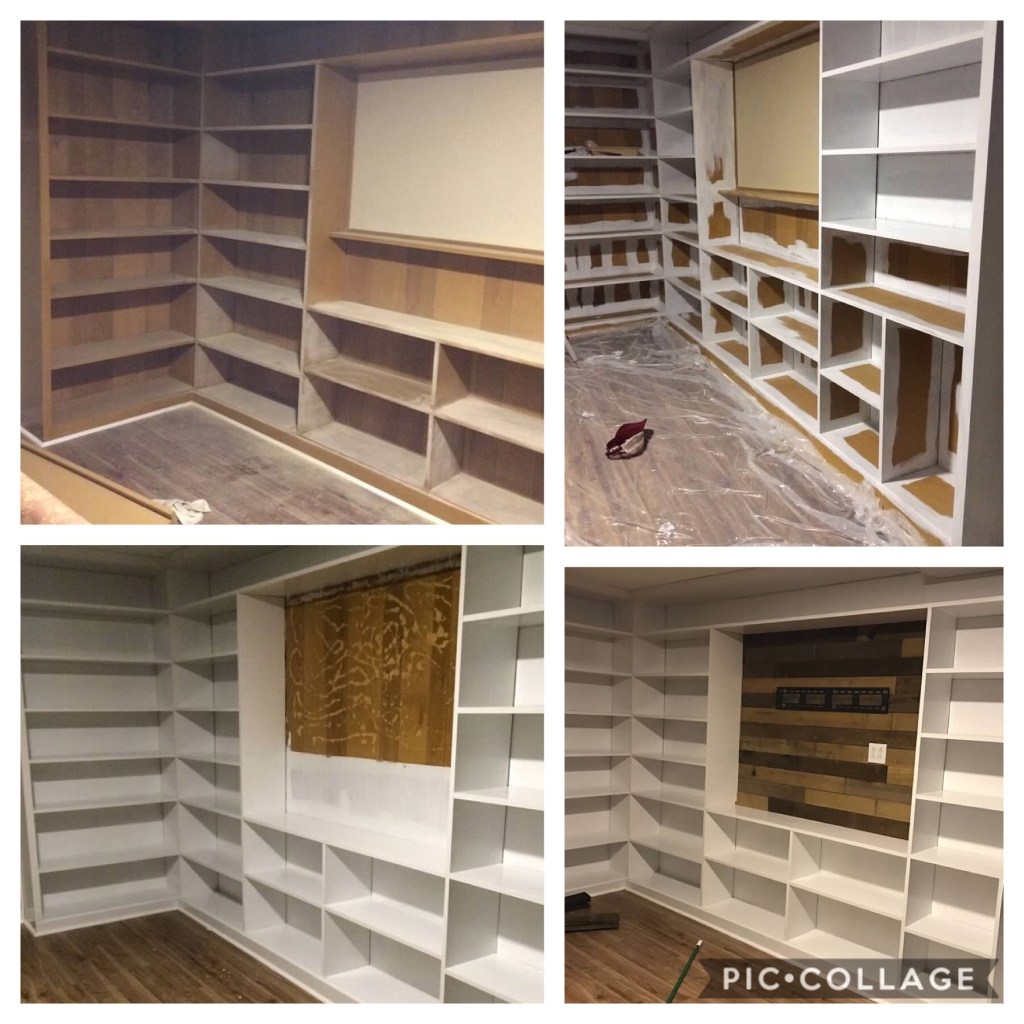
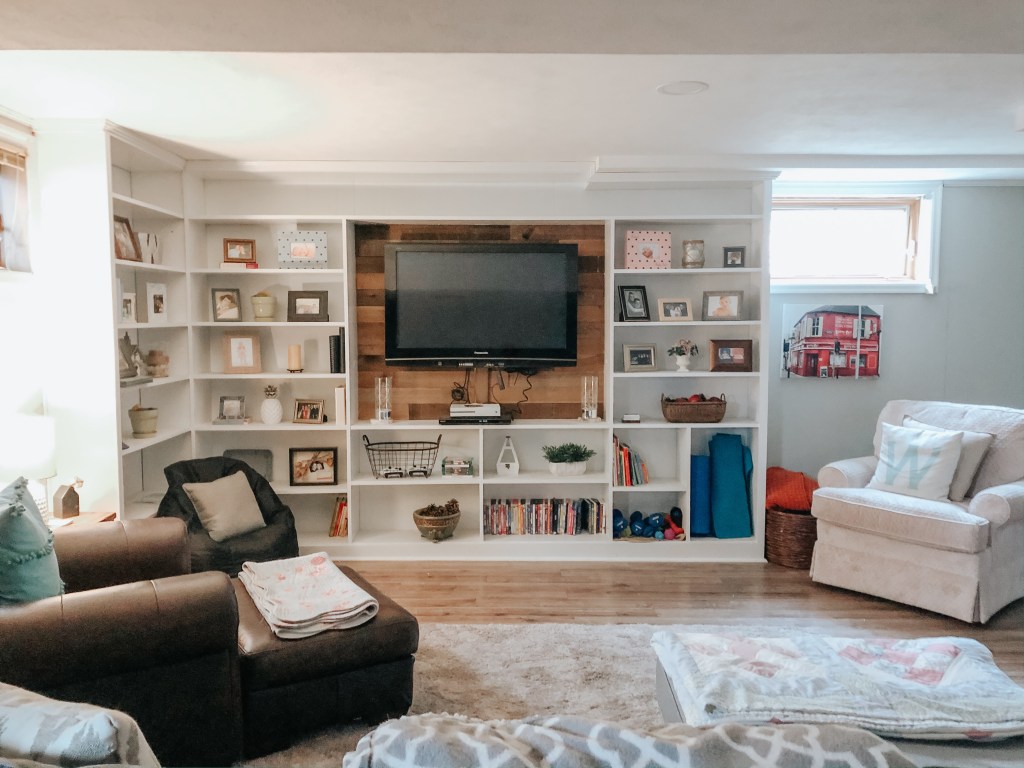
About two years ago, Travis decided to paint the bookshelves, and we rearranged the furniture (and got rid of our tv stand) to make the space work even better for us. Travis loves (or at least really doesn’t mind) painting. This was quite a project while sanding the shelves, painting multiple coats of white, mounting the tv, hiding the wires, etc. He did have a “vision” though and even chose the Weathered Hardwood Planks for the backdrop of the tv.
sanding, painting, wooden planks
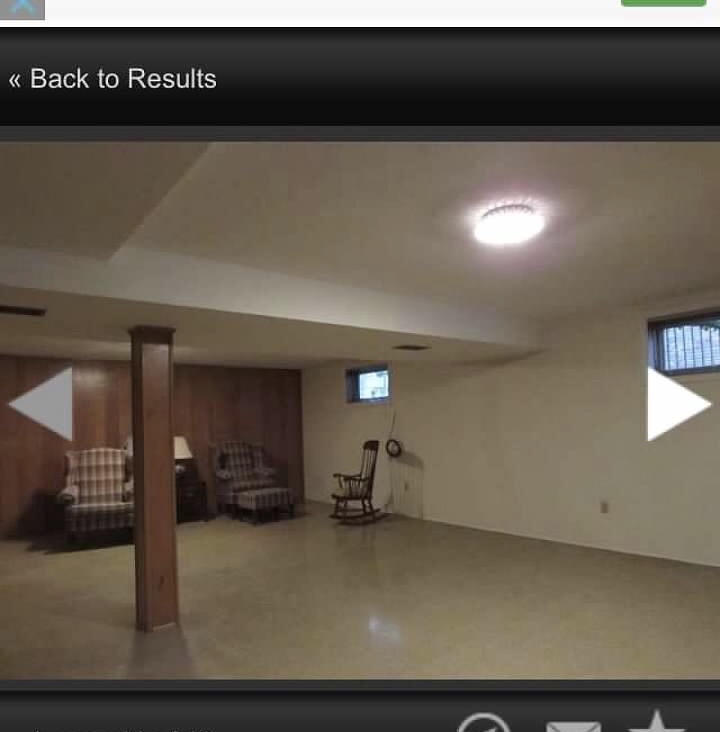
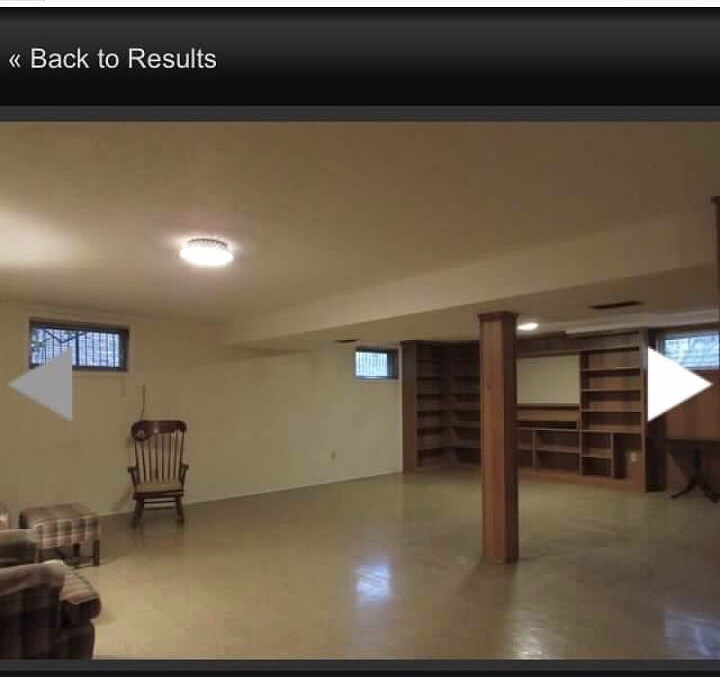
Here are some before and afters of the actual space. I only had two basement pics from the listing.
Before:
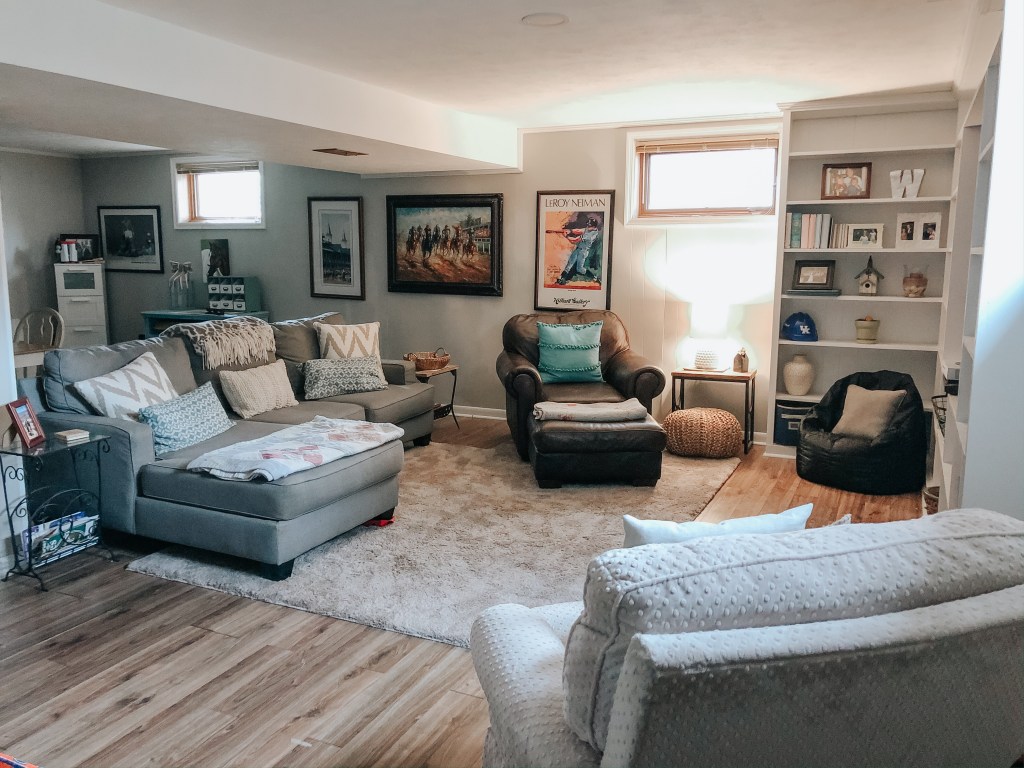
After:
FYI: the pole from the picture above is still there; it’s to the left of the couch and just not pictured. Also, real talk: I tidied up for y’all. 😉
Before:
I’m not sure what, if anything, the previous owners used in the space where we put the tv. I always felt like a pull down map would have gone there. haha
After:
We really do hang out down here often whether it’s watching a movie, Hayden playing Xbox or Hadley perfecting a dance routine. In our old house, we barely used the finished basement. We may have used it more as the kids got older, but in this house, we are kind of “forced” to use the basement as it’s where our secondary tv is and we’ve made it as cozy as possible. One aspect of our house I continue to like is that we don’t have any unwasted space. (Of course, at times, I wish we had a few extra square inches though!)
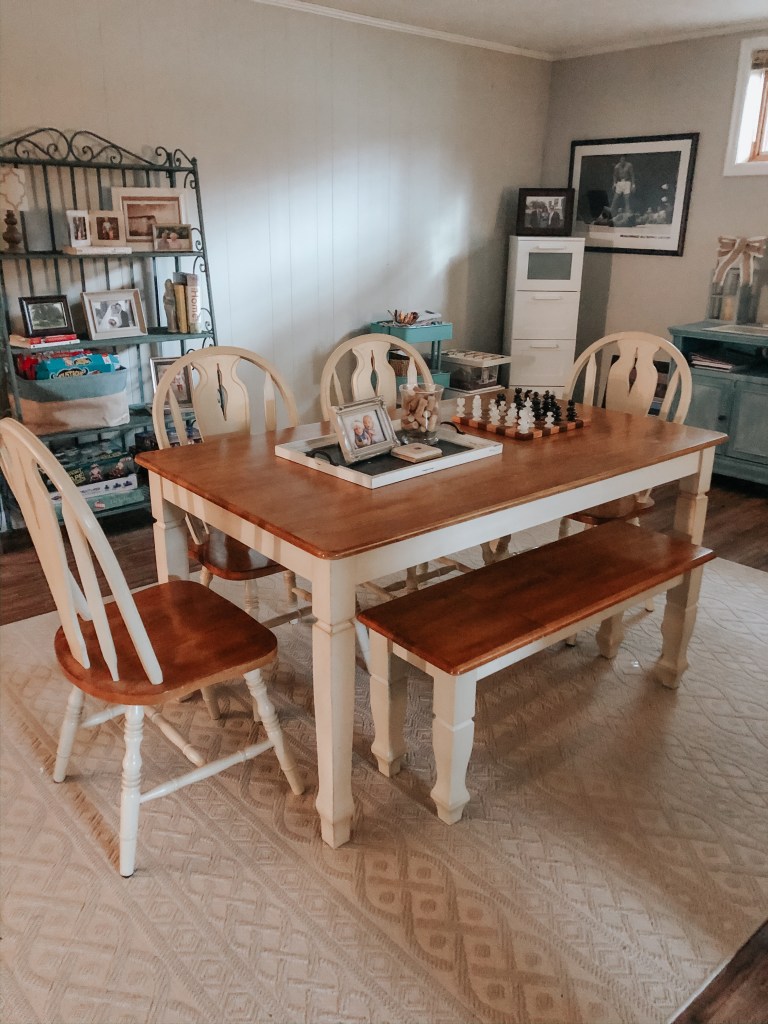
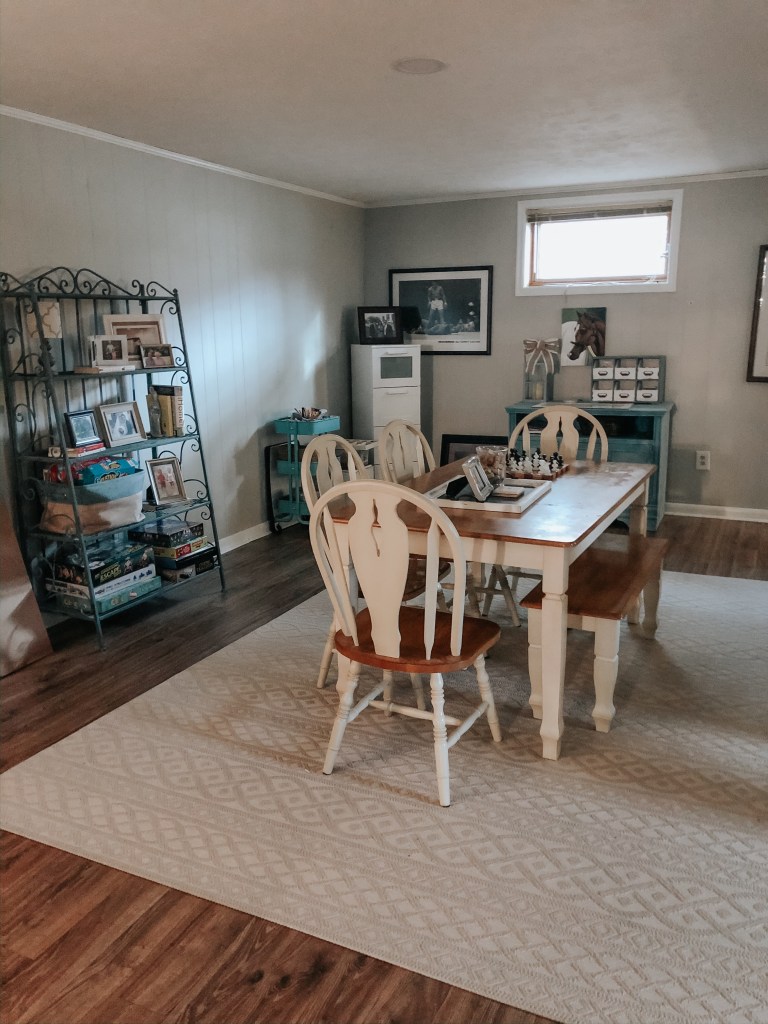
view from behind the couch
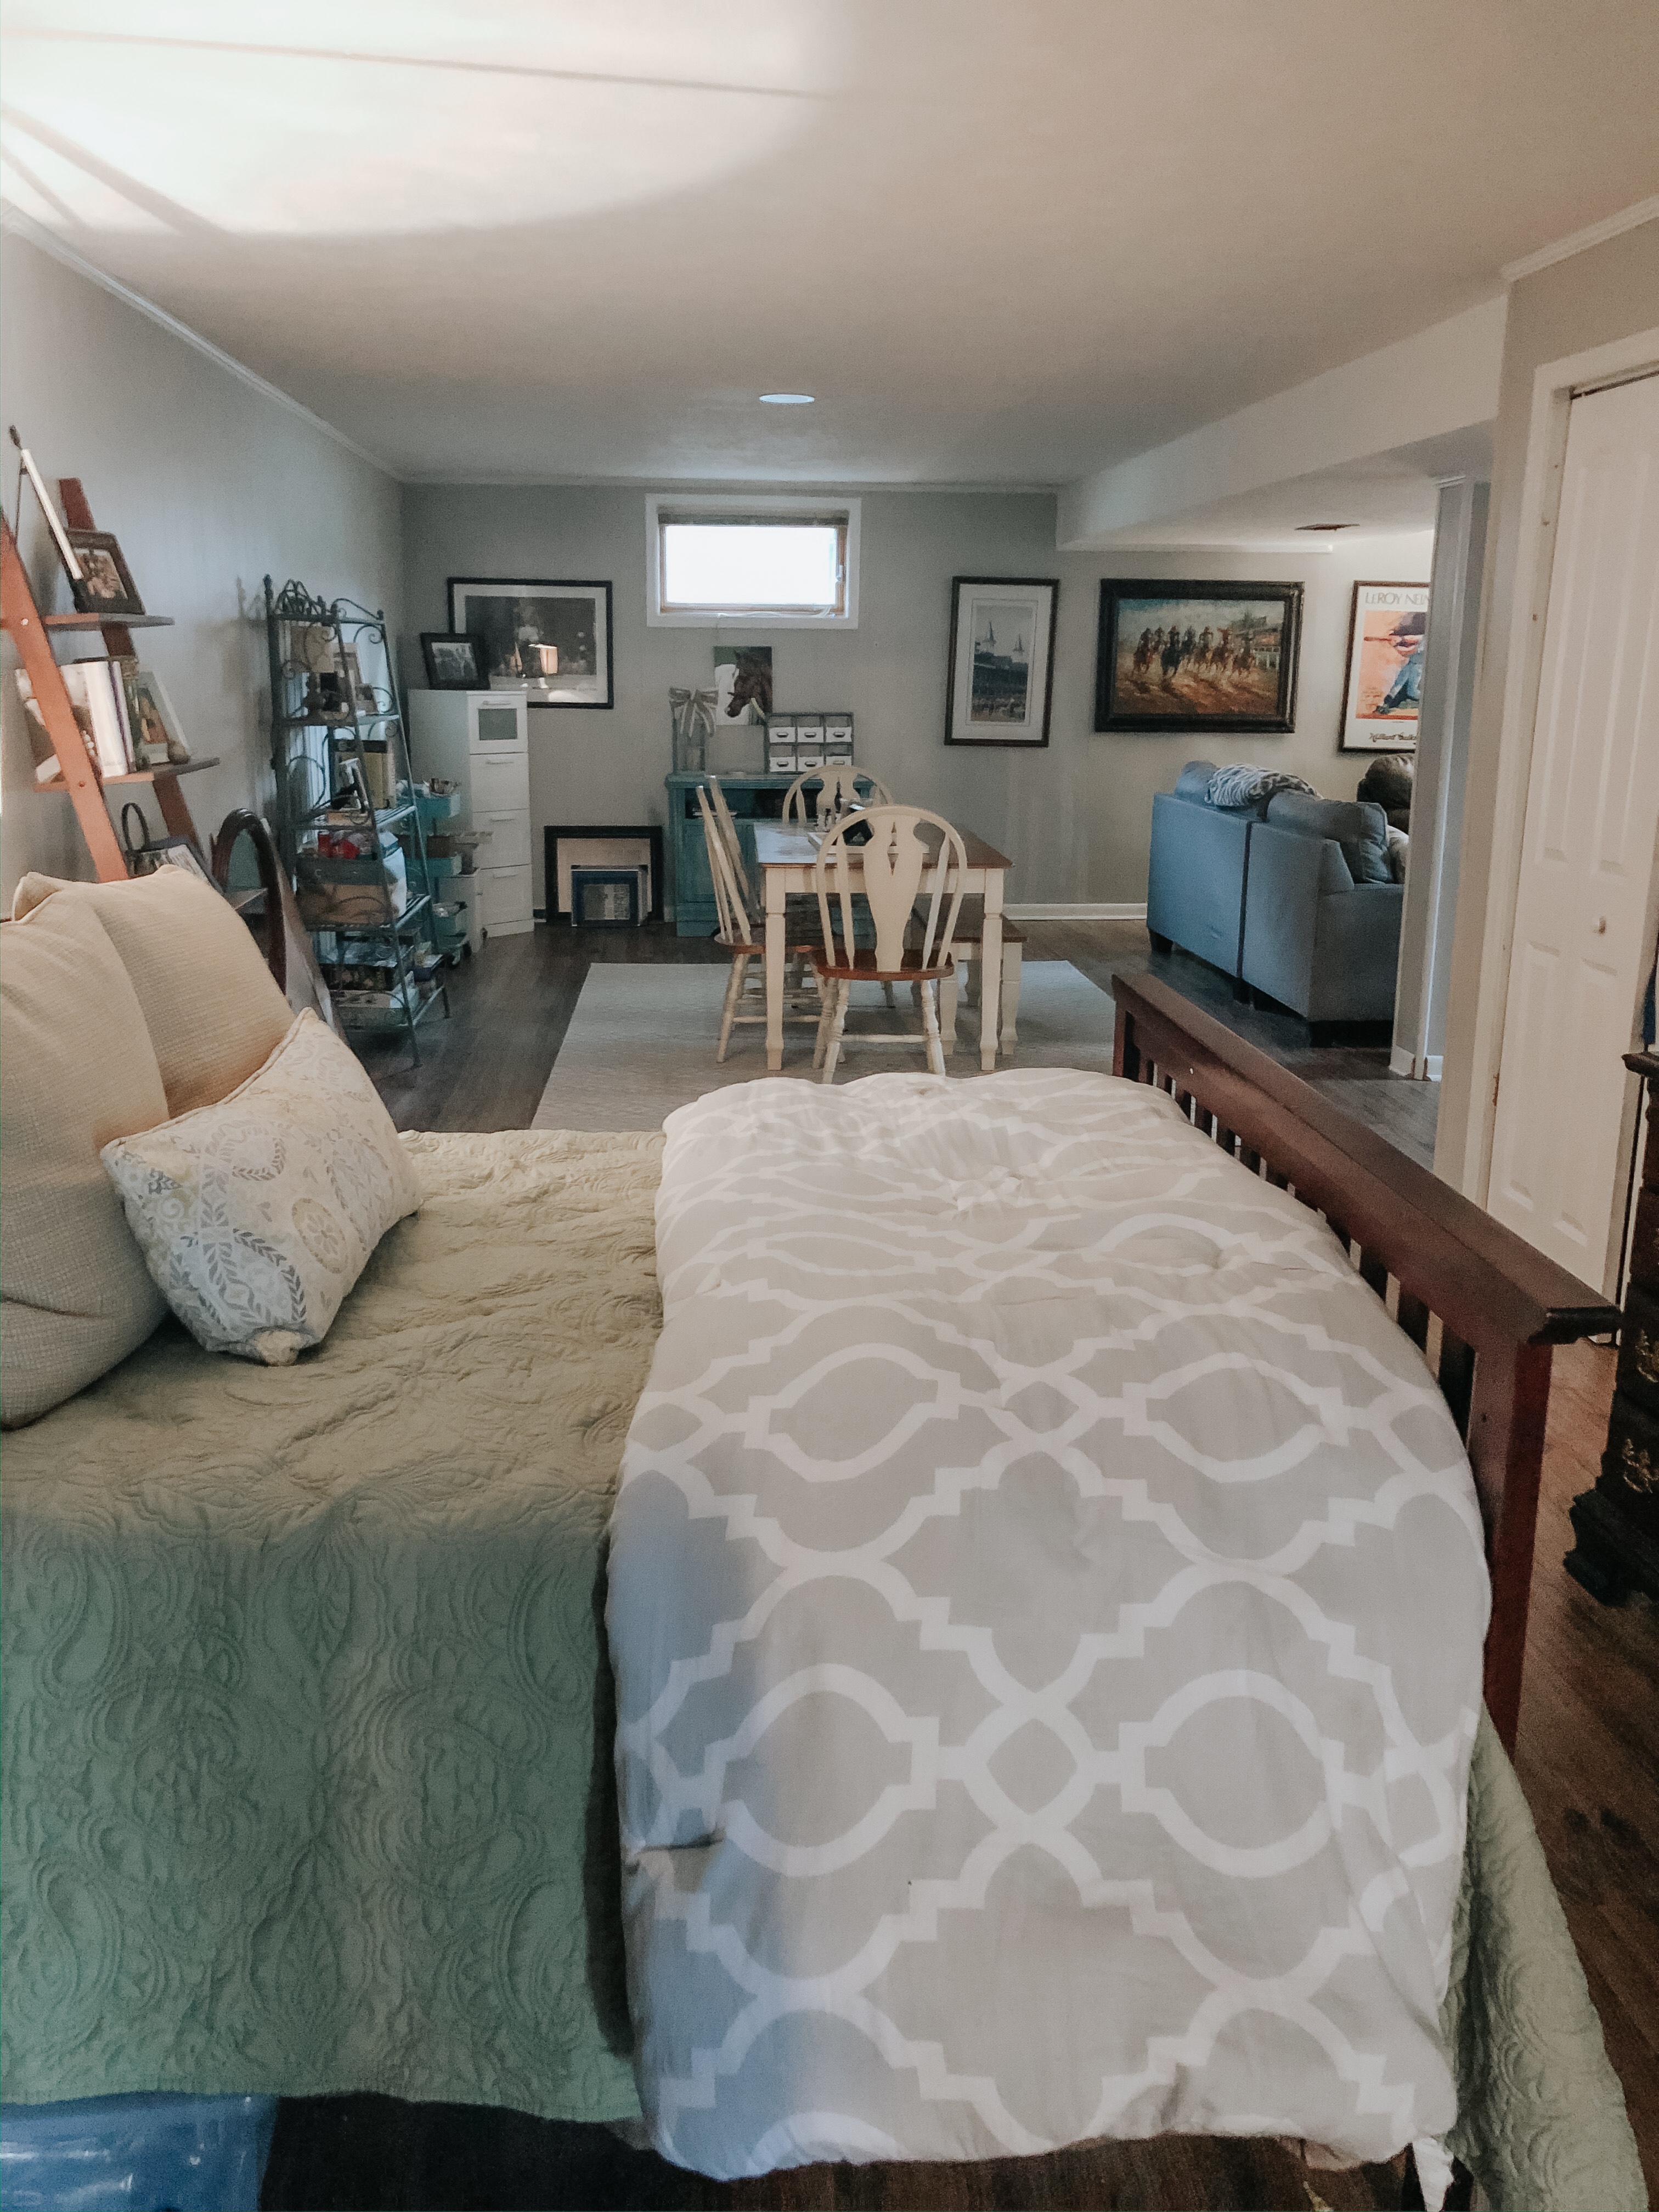
This is the area behind the couch. After we had our farmhouse table built for the kitchen, we put our previous kitchen table down here. We actually do use it a bit. If we have friends and family over, the kids come eat down here, I use the table space to wrap gifts, and the kids even do projects and crafts at the table.
We keep games and art supplies in this area. Also, Kristy Wicks shared this very affordable indoor/outdoor rug in her Insta Stories about a year ago. I wanted to break up the floor space, and I ordered it. I love it; it’s been perfect for this area.
The rug is the 8×11 in the ivory color
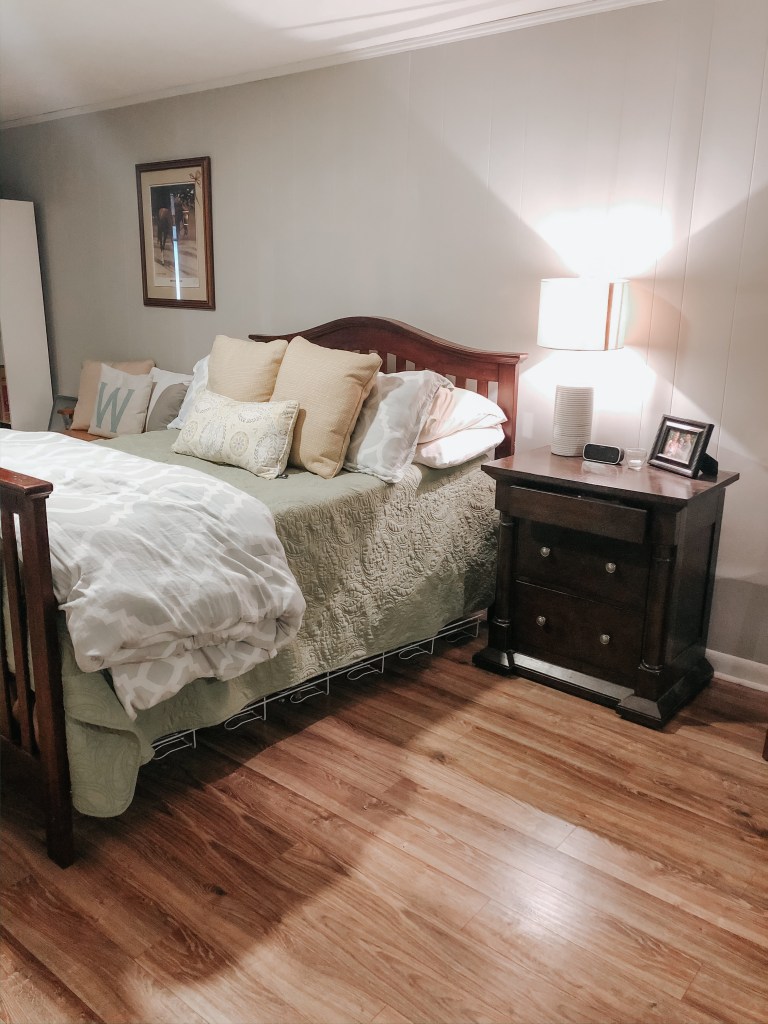
On the other side of the basement, we have a bedroom area set up. Since my family lives out of town, we usually have visitors at least six times a year.
We (I) kind of struggle with this space. I feel like it is warm and inviting…it’s just that we’ve toyed with a few ideas and are unsure of what to do. To the left of the bed is the door to the garage. So we’ve thought about putting a wall up where you enter from the garage as there’s another door that can lead to the stairs to go upstairs. Also, we’ve thought about putting up two walls (on either side of the bed) as there’s a vent, a ceiling light, a closet, and electrical outlets, so it could be a small bedroom. I just always worry it would make the basement feel too small if we put walls up.
I honestly think the best option is to purchase a Murphy bed, so we can just pull it down when needed. Anyway, we haven’t made that kind of investment a priority. And, the space does work…that part is just a bit awkward, in my opinion.
This is the view from the garage as you enter the basement.
So, that’s the basement space. We’ve chipped away at updates down there along the way. I am glad we’ve made it a homey and cozy space as we do have guests somewhat often, and we do spend time down there more than I ever thought we would!
Happy Tuesday! And…Happy St. Patrick’s Day. We “celebrated” on Sunday with corned beef, cabbage, and Irish Soda Bread. I may give the kids Lucky Charms for breakfast and call it a day 😉
This is my third TransformationTuesday post in regards to the updates we’ve done on our house. The first post was about the basement bathroom renovation and then my second post was about our living room/office area.
As I’ve stated previously, if HGTV and Pinterest didn’t exist, I never would have had the “vision” of what our home could be, and I never would have given it at chance.
In my last post, I mentioned how we turned the formal living room into our main living space. Then, we used the dining room for a bit before turning it into an office area. Those rooms connect to the kitchen area.
The previous owners used part of the kitchen space for their kitchen and the other half of the space for their informal living area.
After living in the house for only a few days, we had the room doorways widened. Then, we tackled the floors. Again, I mentioned before that under the carpet in the formal living and dining space, there were unfinished floors. So, we ripped up the carpet in the kitchen and informal living room to find sub floors. We had wood laid, and then stained everything the same stain color.
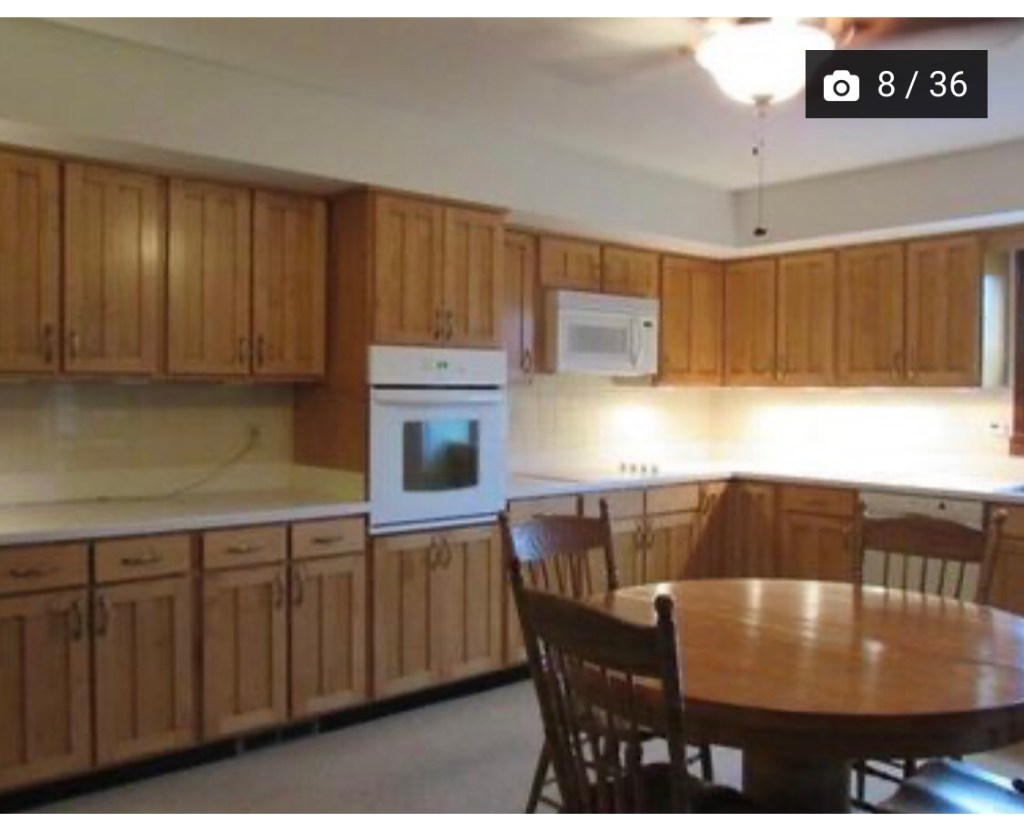
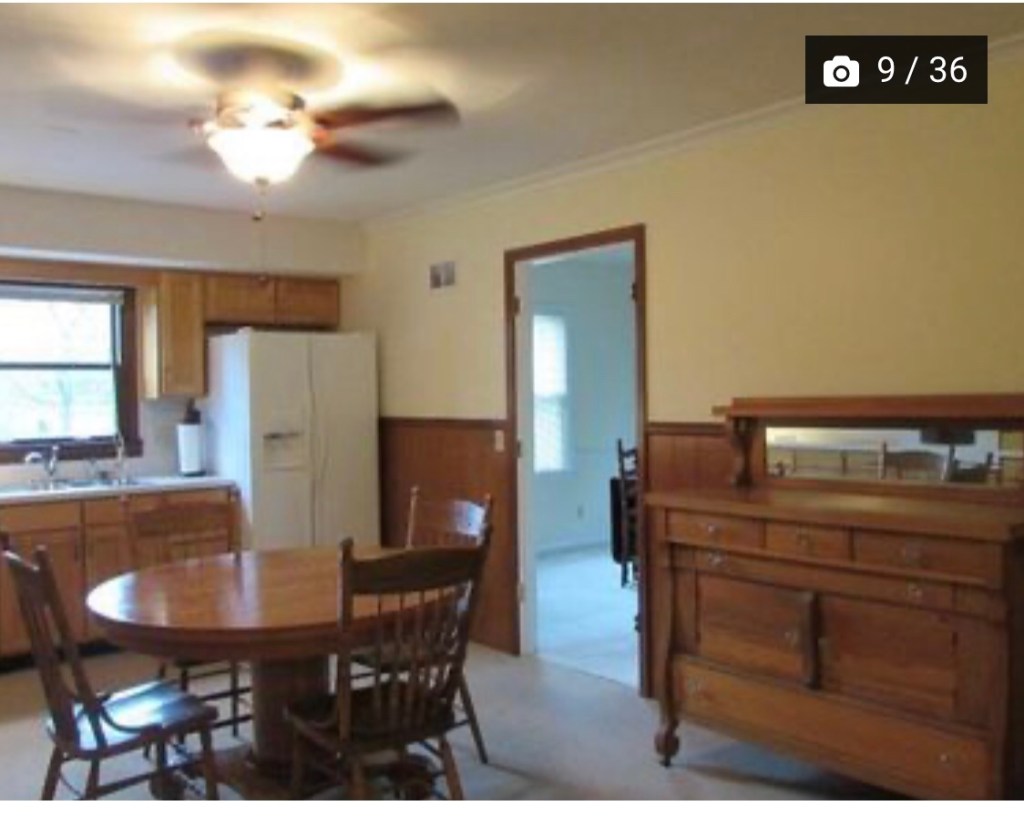
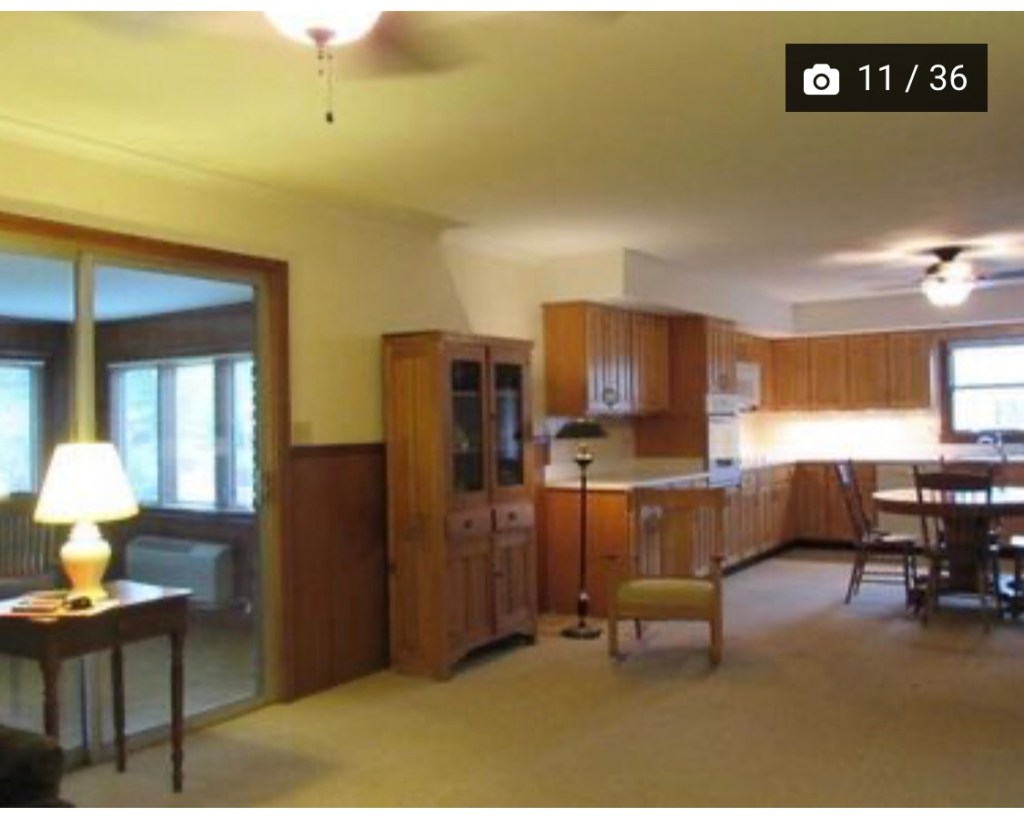
Before:
The kitchen is big and the cabinets are great quality. Also, the counter tops were a light colored Corian material, and we were pleased with them. What were we not so pleased with? Uh…the carpet in the kitchen! To be fair, the carpet was immaculate. An older couple had lived in the house before us…but carpet with four-year-old twins was not a good combo upon moving in! I also didn’t love the fact there was a ceiling fan so close to where I’d be cooking. We actually moved the ceiling fan to our living room! Win win.
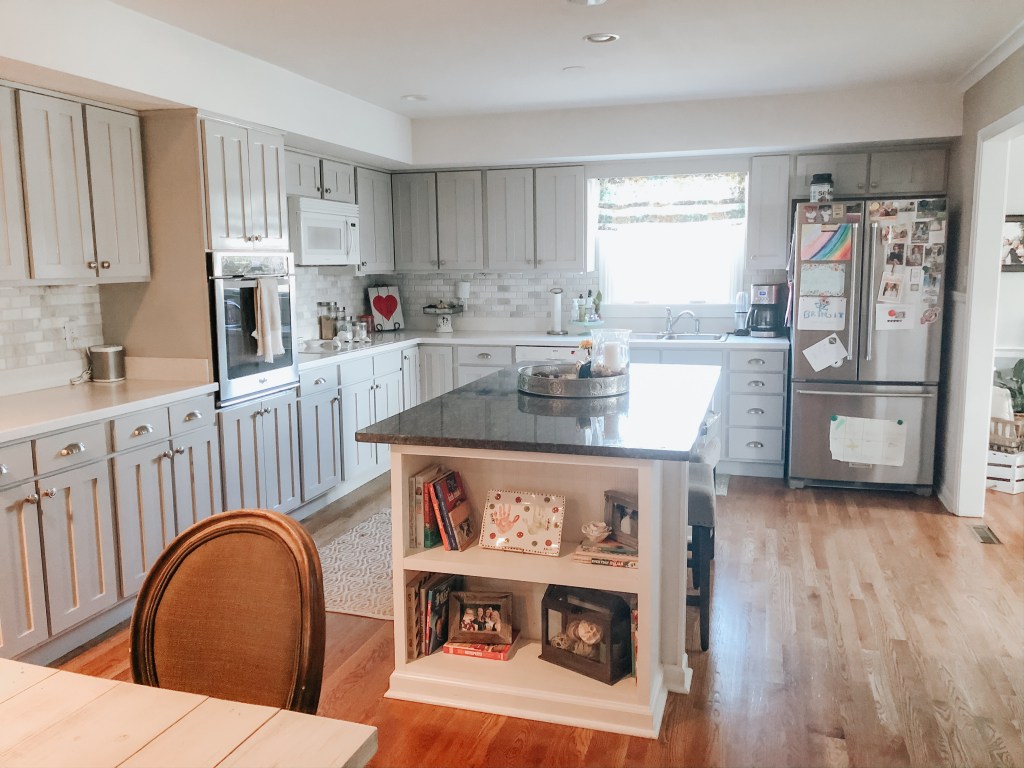
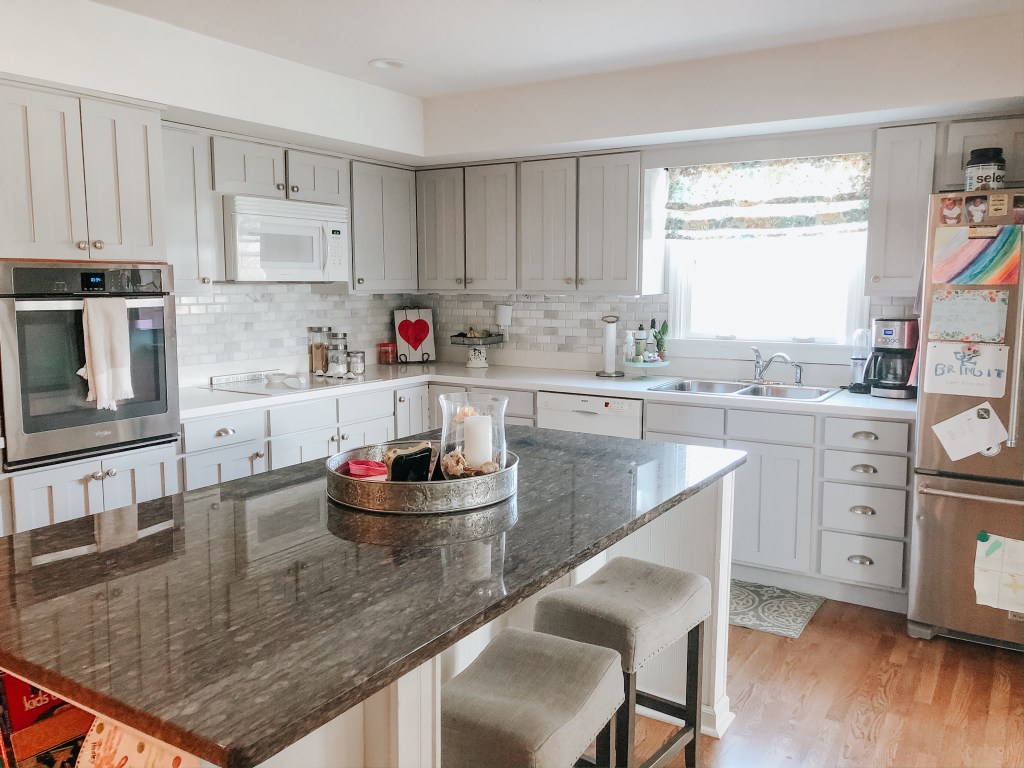
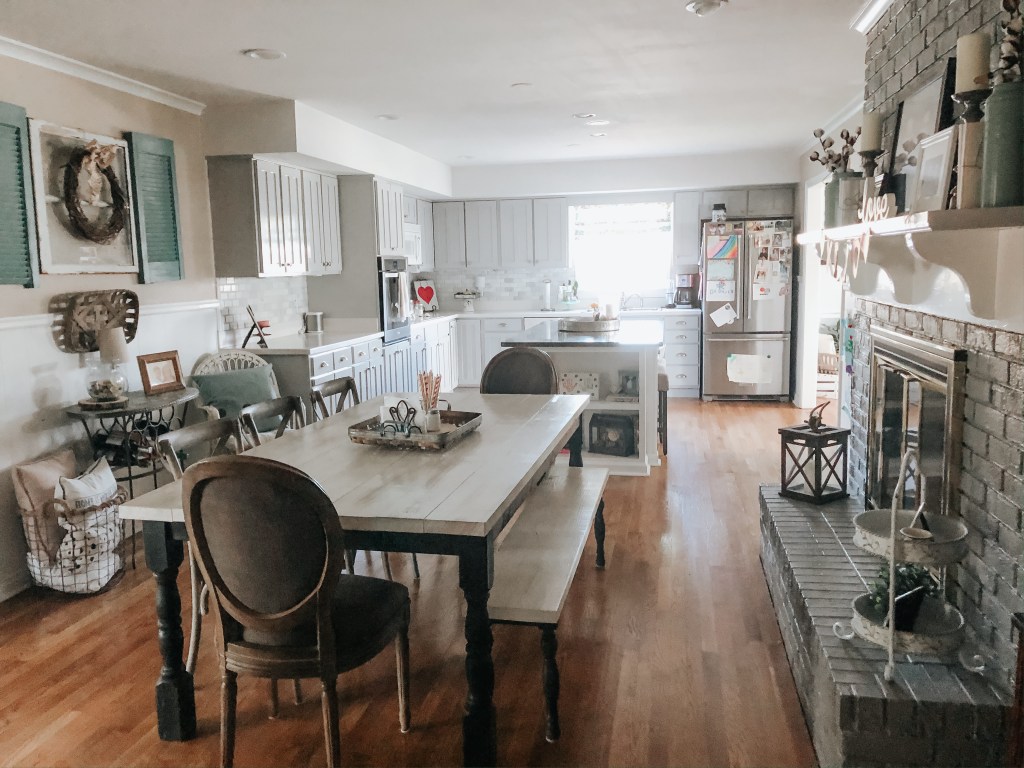
After:
The island with built in shelves was always a dream of mine. I loved picking out the granite (sticking with my color scheme of gray!), and the kids eat breakfast at the island every morning. We don’t have a pantry, but we do have tons of cabinet space, so we are lucky in that regard. The oven was the first appliance we swapped out…but only after it went kaput after living here about a year. Then, we needed more room in the fridge, so we purchased that next after about two years. The dishwasher and microwave are high quality, so we’ve left them as is for now, but will probably get new ones at some point. I also dream of a new sink and gas stove. I’m hoping to cross those things off the list sometime in the near future.
We also added recessed lighting throughout the kitchen. The only light that was in that entire space was the light from the ceiling fan at each end of the room and some under cabinet lighting.
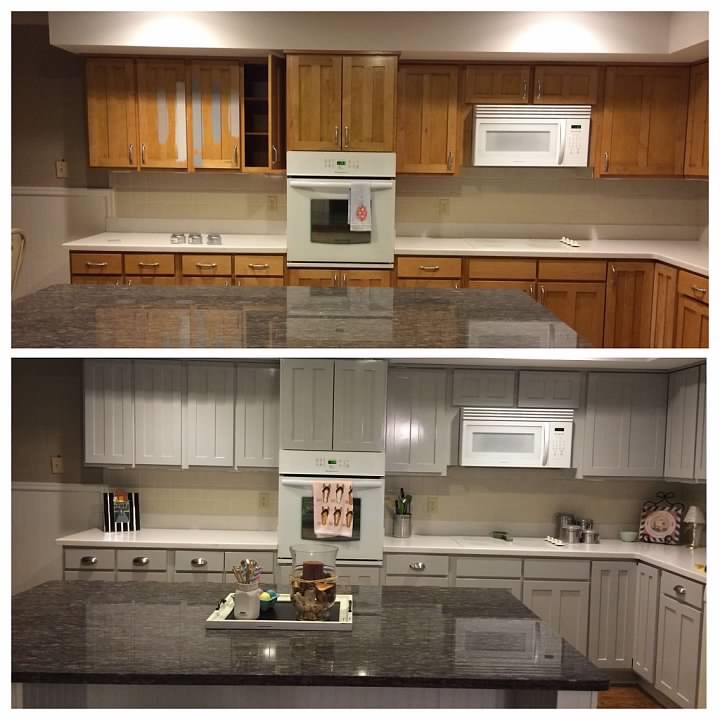
Before:
After:
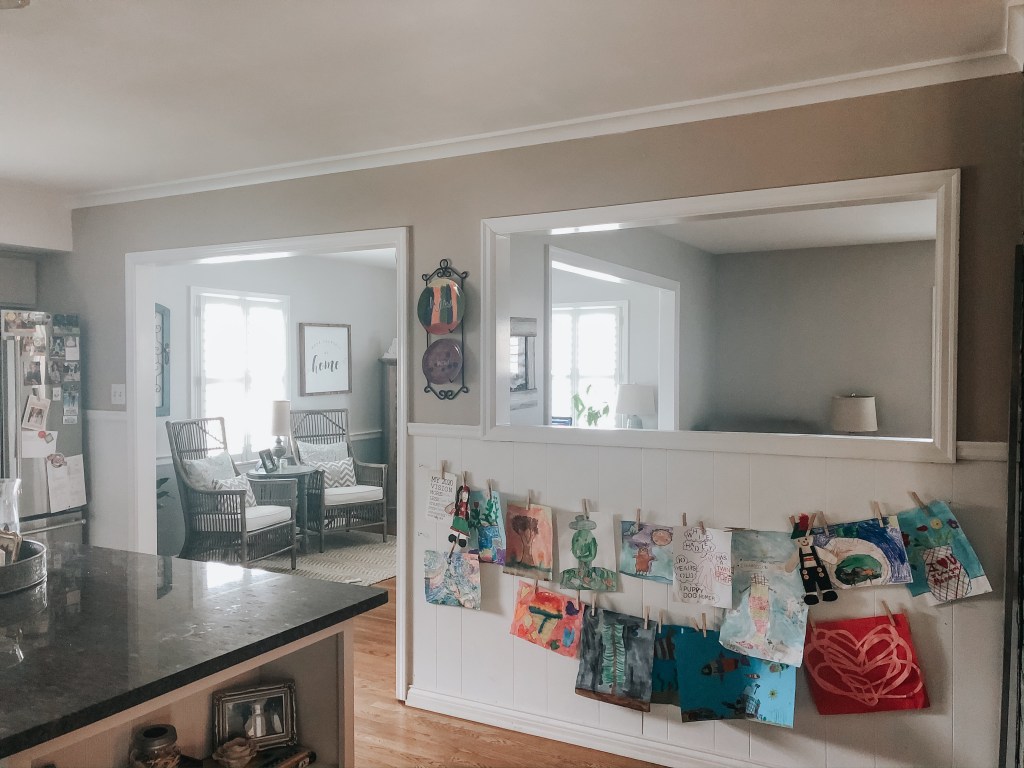
Travis painted the paneling white as a quick fix. Then, he used Pavilion Beige on the walls which is what we painted our walls in our former house before putting it up for sale. Also, there’s the cut out that looks into the living room.
Right when the kids started kindergarten, I put up the fishing line and clothes pins for them to hang their favorite school work. It’s so weird to think there’s only about one more year of elementary work to hang up on my Pinterest project!
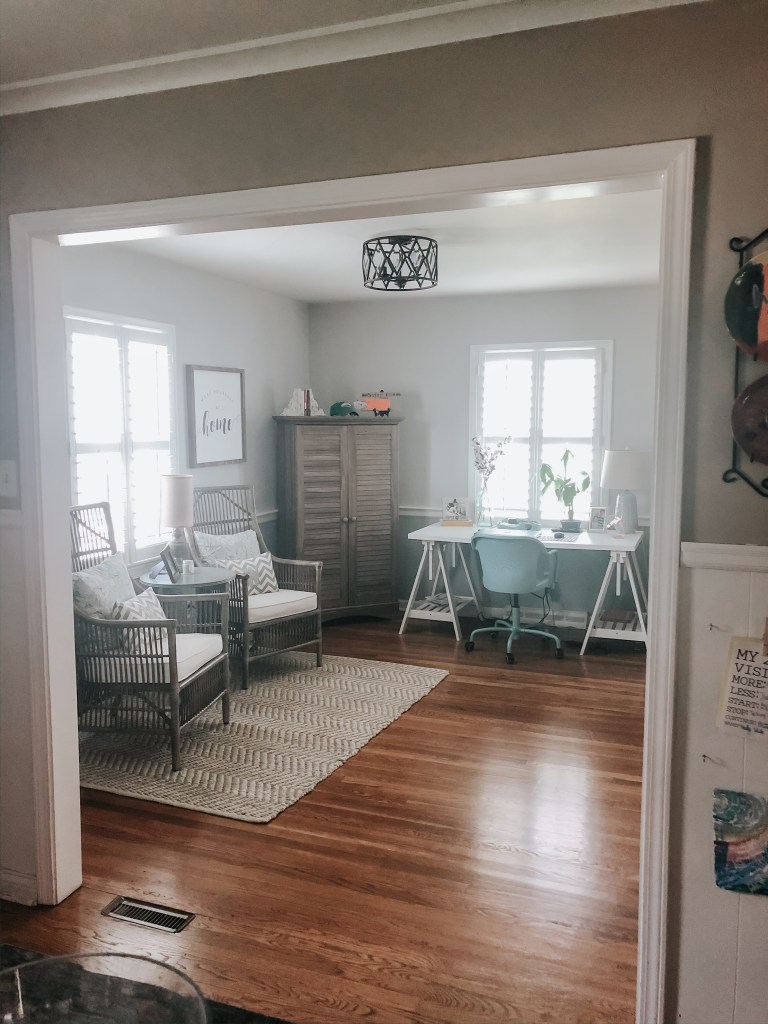
The view from the kitchen into the office space. I love the light fixture in the office. There was a chandelier there when we used that space as a dining room.
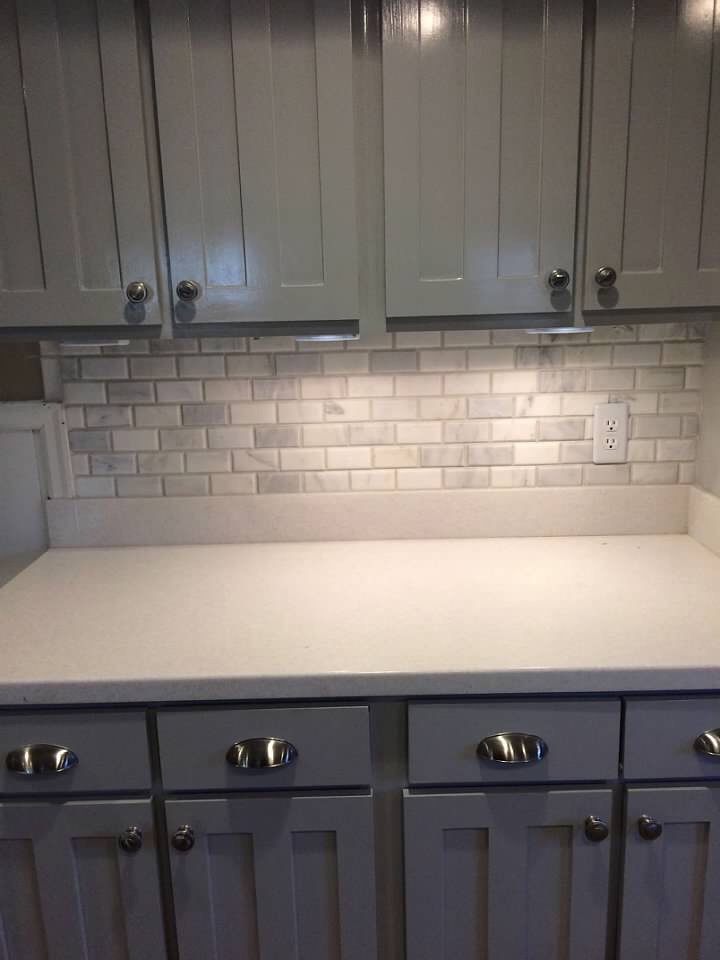
Cabinets and Back splash Updates:
I like to make things as pretty as possible as soon as possible. One thing I was very proud of is that we lived in the house awhile before making some decisions. We’d lived in our house about a year before we decided to paint the cabinets. I debated between a gray or white for the cabinets. At the time, the back splash was an off white tile. While I knew we’d change it at some point, I just didn’t know when. Also, with the white paneling, I was afraid the whites wouldn’t match or it would be too much white. So, we went with a gray color. After much debate, (why are grays so difficult?!), we chose Sherwin Williams Light French Gray.
This picture of before and after popped up on my Facebook memories recently. What perfect timing! You can see the colors we were thinking about in the cabinets on the left.
Two men painted the cabinets in a few days, so it was a pretty painless process (after we got the paint color chosen! 😉 Then, of course, we needed new drawer pulls and knobs. (Knobs aren’t on yet in the “after” photo.)
I think about six months after we got the cabinets painted, we had the back splash updated. Our neighbor installed it for us and was tedious with choosing tiles that would be a good combo of colors. Not too many white tiles vs. too many gray tiles! Balance.
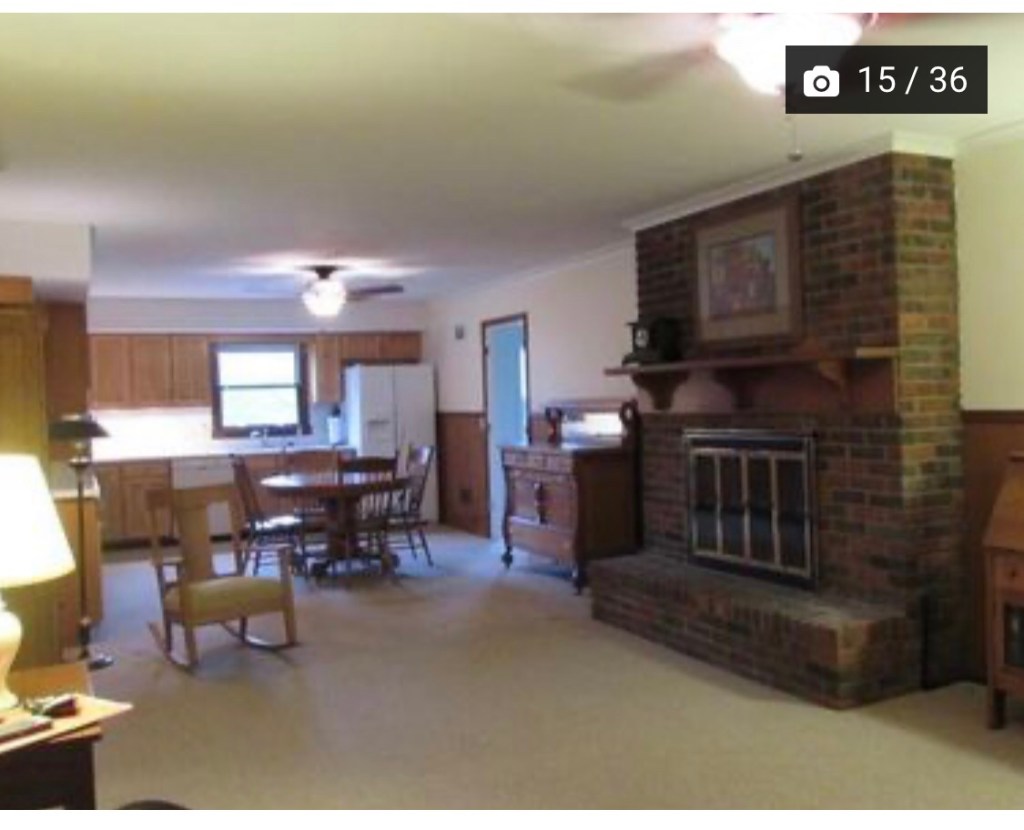
Before
Again, the owners before us, used this space as their informal living room. It’s where we put our farmhouse table when we had it built.
After:
We love the farmhouse table and bench that a local craftsman built. I bought the chairs on Joss & Main.
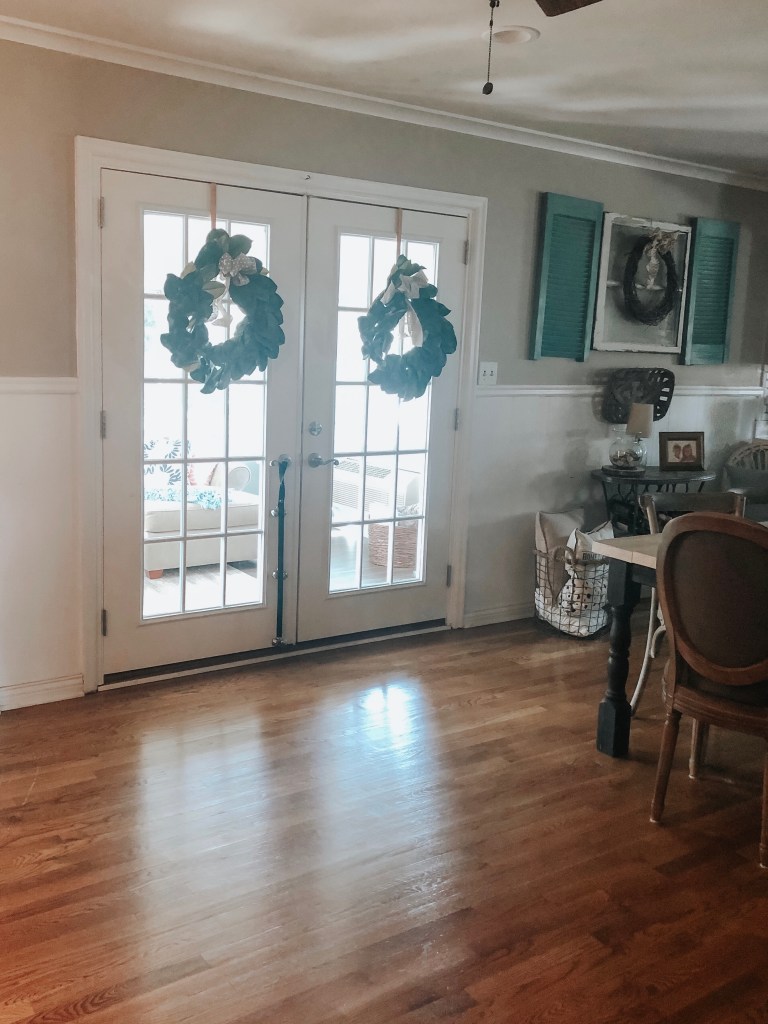
There was a heavy sliding glass door that leads out to the sun room. Another one of the first changes we made was getting French doors which made a pretty dramatic difference for this area of the house
Fireplace Before:
The fire place as another part of the house we “lived with” for awhile. We weren’t sure if we should paint it or not. After living here about a year, Travis painted it as we thought it would lighten up the kitchen even more. We’d heard that painting brick can be difficult and take multiple coats, but he didn’t have any issues and had the project completed quickly.
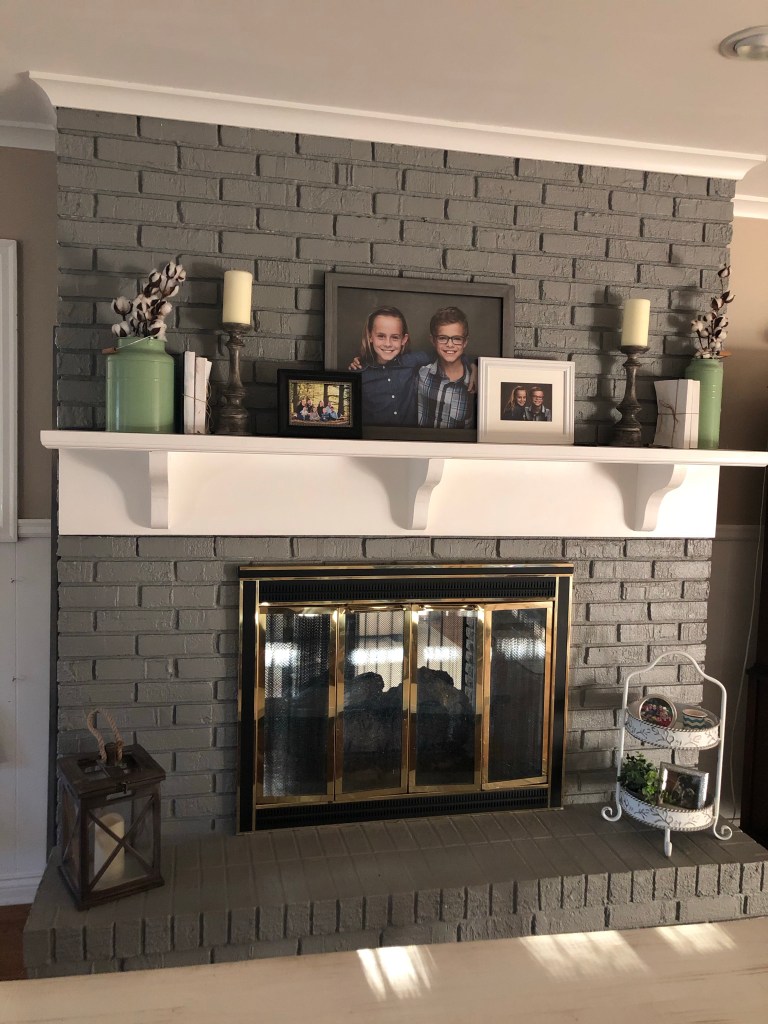
Fireplace After:
We get a lot of great natural light coming in from the sun room, and adding the gray paint made this area even lighter.
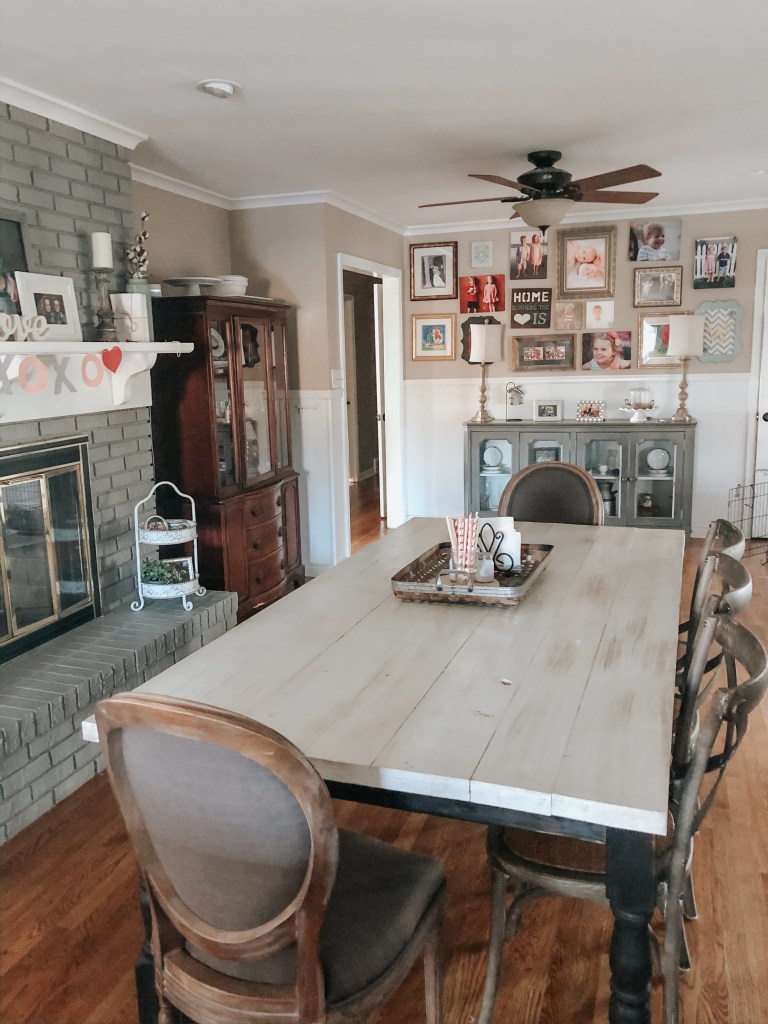
Still the kitchen, but another angle. The previous owners had a built in shelf for their television at this end of the kitchen.
Also, we had a gallery wall in the living room of our previous home, so I added some of my favorite pictures to this wall within a few months of us moving in.
I like the mix of modern furniture with antiques in this space. The cabinet on the left is a family heirloom that my dad gave to me. We added it to our kitchen about a year ago after I visited KC and then rented a small U-Haul to bring it back.
We purchased the accent cabinet from Ashley furniture a couple of years ago when there was a sale going on. I’d never had a place to showcase the China we got as a wedding gift (and never use ;). I also use that space to safely house some of the kids’ pottery projects throughout the years.
I really do love that we are able to utilize all the space in our house. In our old house, even now with two kids, I know we still would have wasted space. Of course, sometimes I wish we had bigger bedrooms and bigger closets, but the main living areas have been pretty perfect for us. It’s been fun scratch my creative itch and make decisions a long the way for our home.
I continue to be thankful that Travis found this house and pestered me until we went to look at it 😉 Plus, if you haven’t noticed, Travis likes to tackle projects…especially those that have to do with painting!
I hope you are having a great week. Thanks for reading, y’all.